For Japanese version, refer to my Facebook post
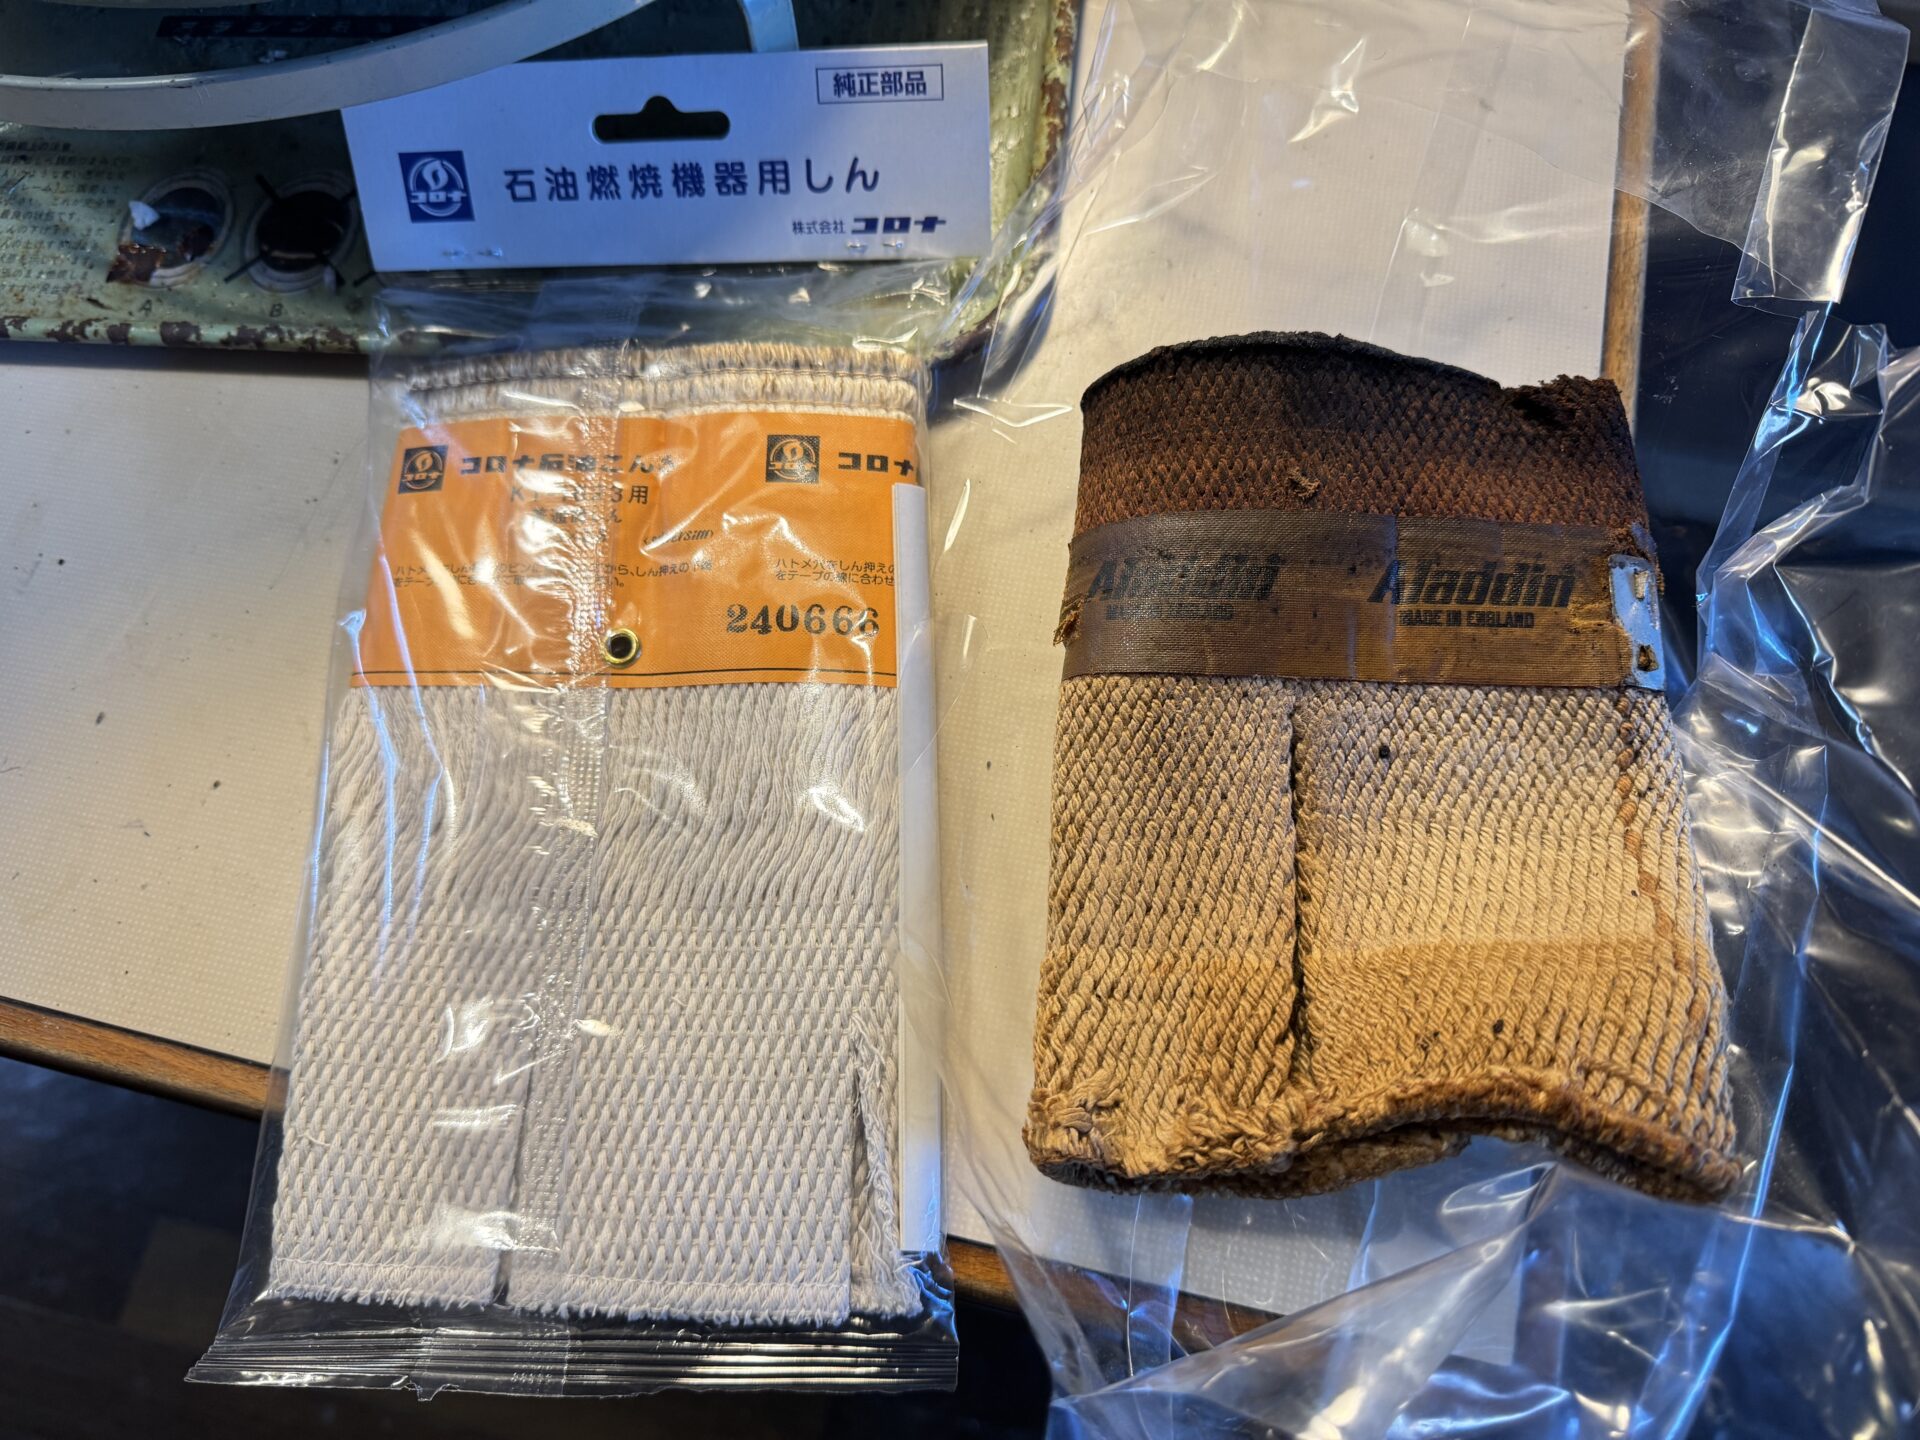
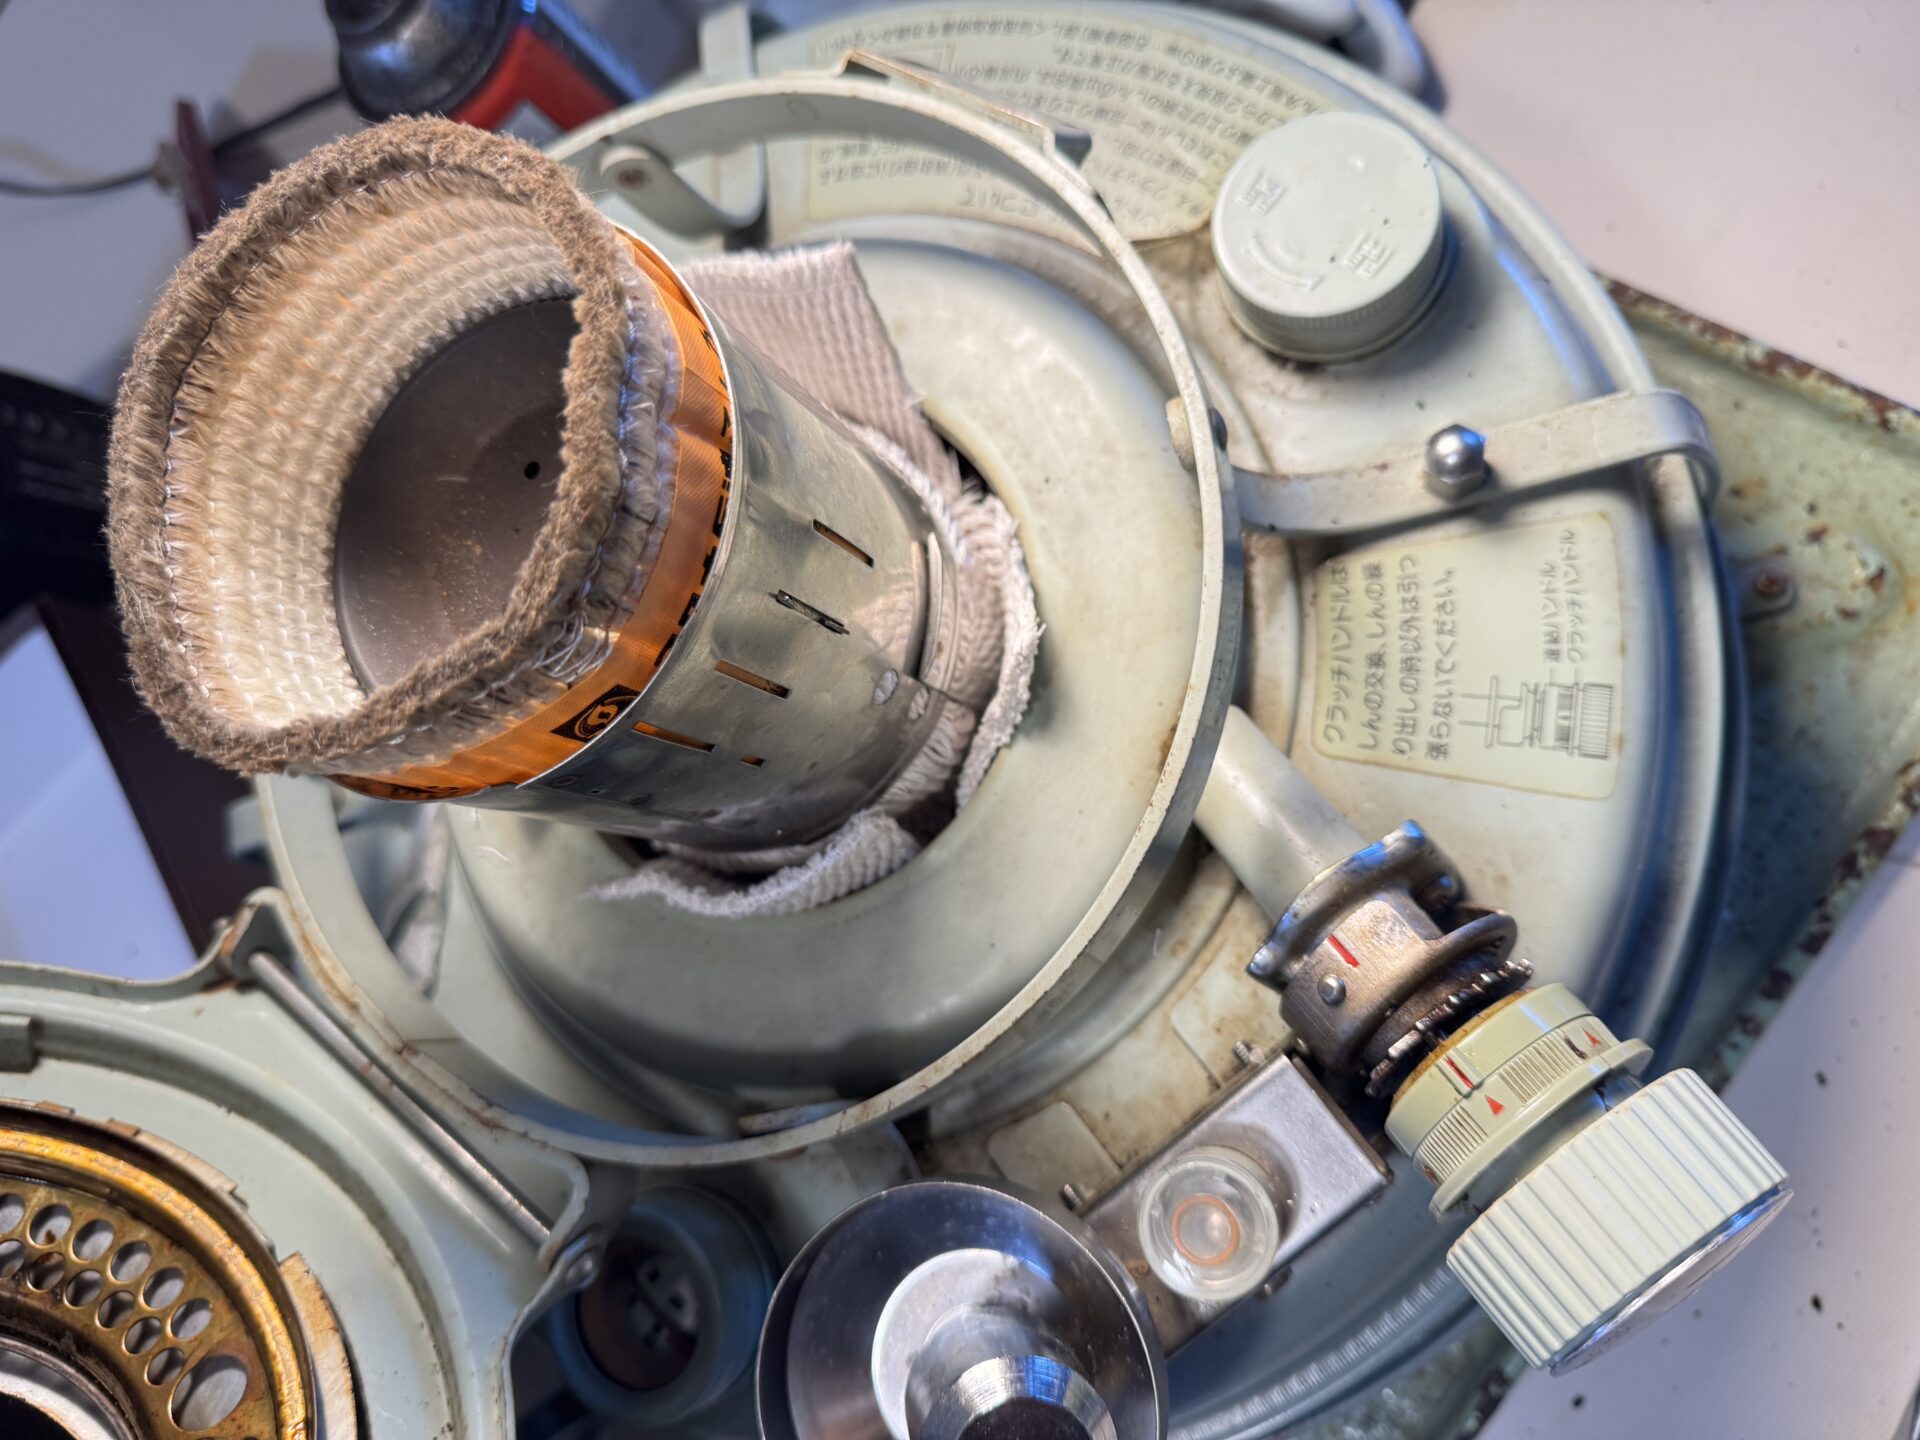
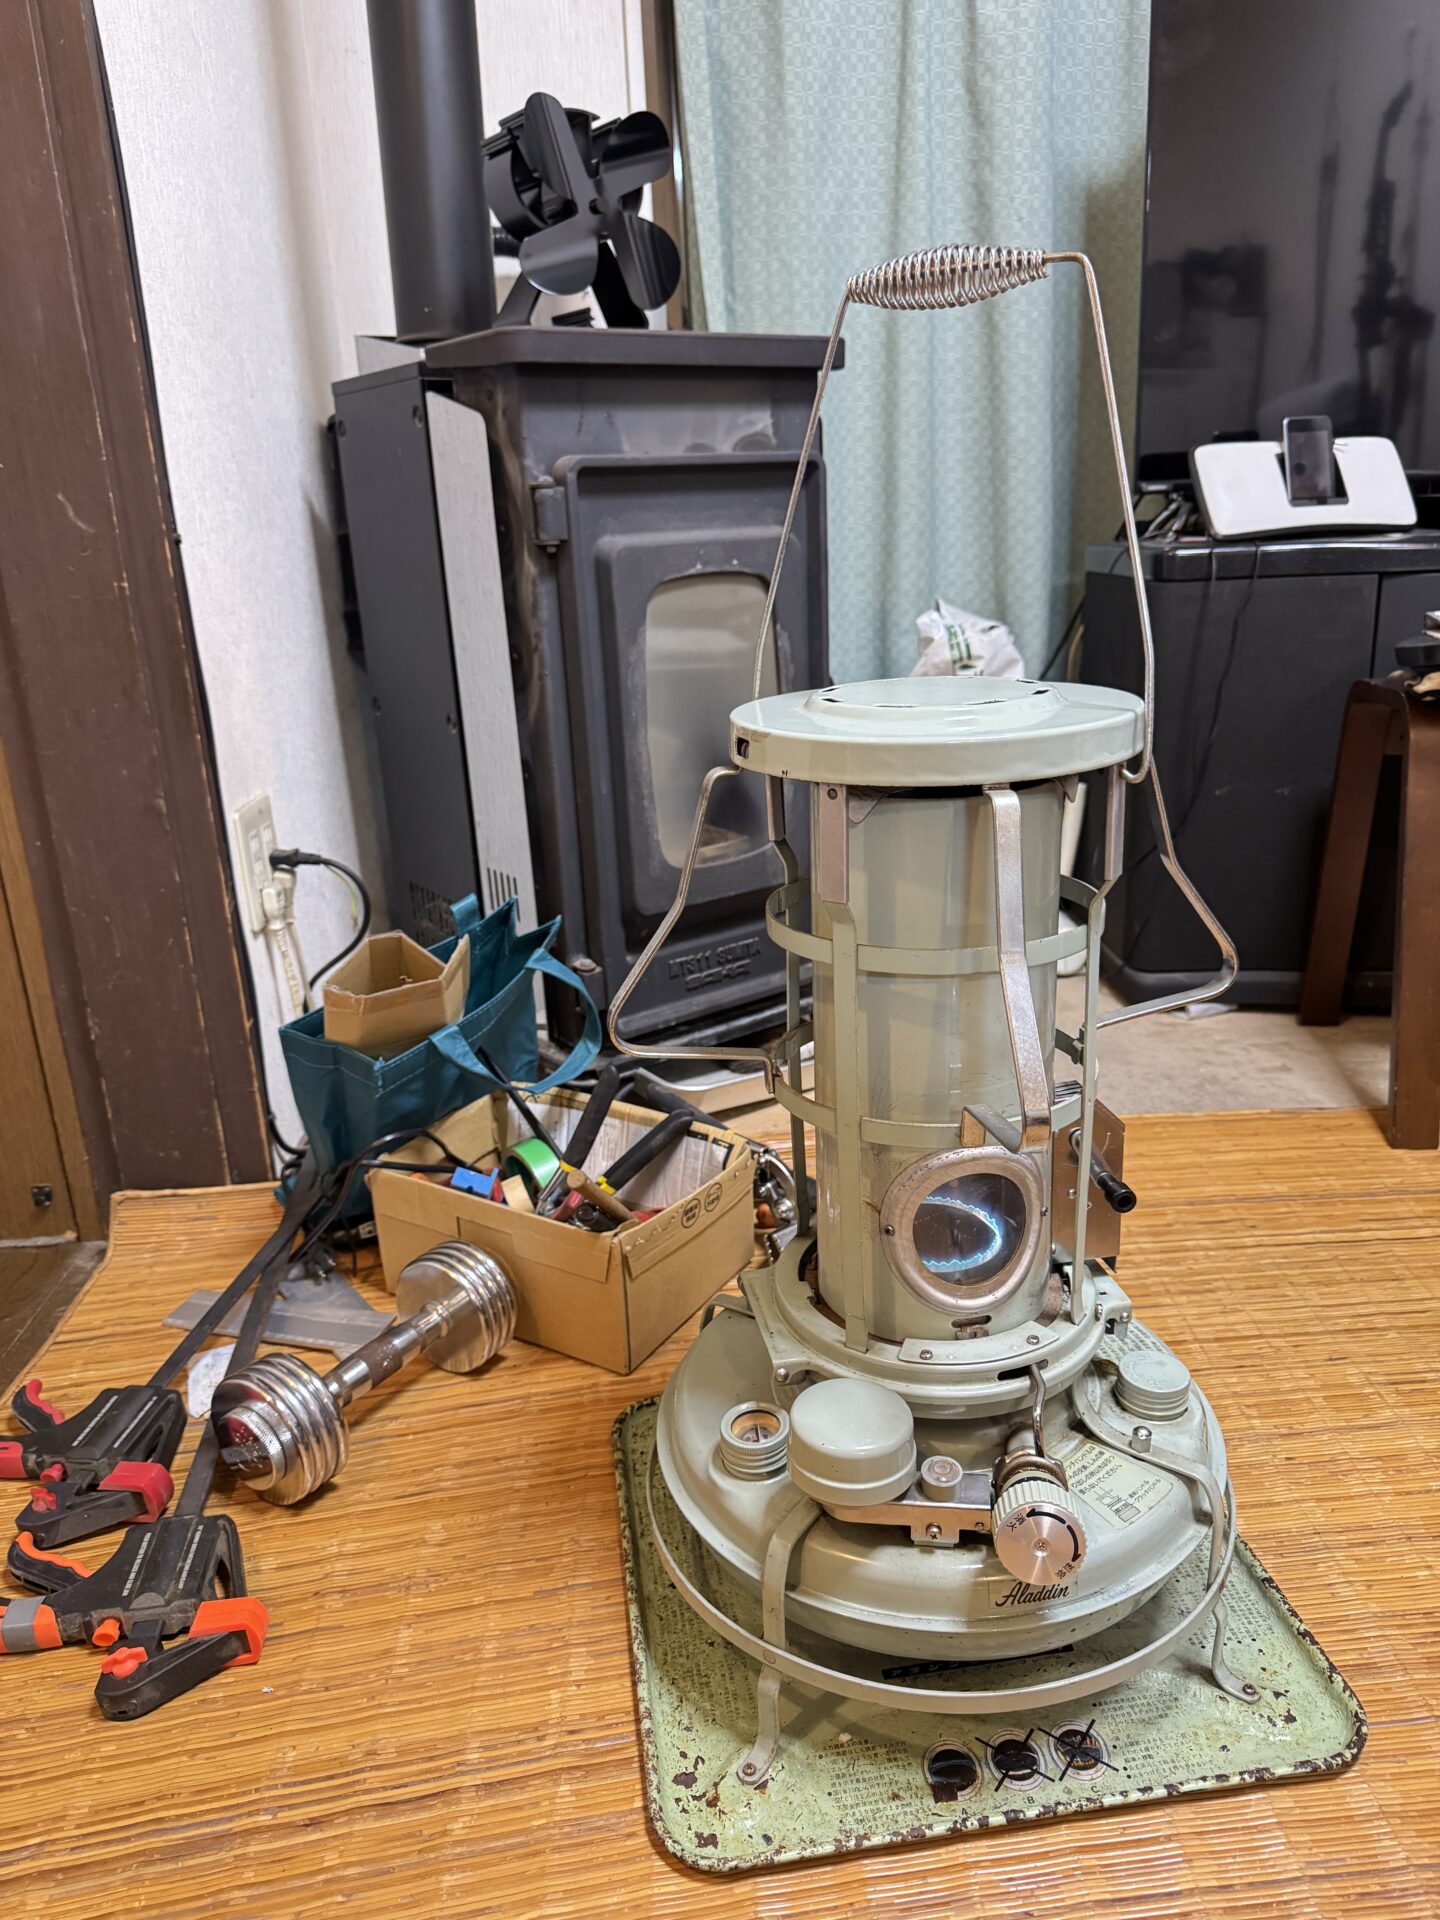
I got replacements for the broken parts of my Aladdin Blue Flame Heater that I bought on Mercari the other day– the parts I obtained at Mori Hardware Store in Saga. So I tried repairing and modifying it. The replacing process of those parts was the same as in my previous post: swapping out the heat adjustment knob. As for the modification, I just replaced the original cotton wick, which had been stuck after years of dormancy, with a glass fiber one.
The cotton wick gradually carbonizes at the tip with use, so you need to scrape off the charred part at the end of the season. Furthermore, the wick also wears down from dry burning when the kerosene runs out. Since the glass wick doesn’t burn, it should theoretically be maintenance-free.
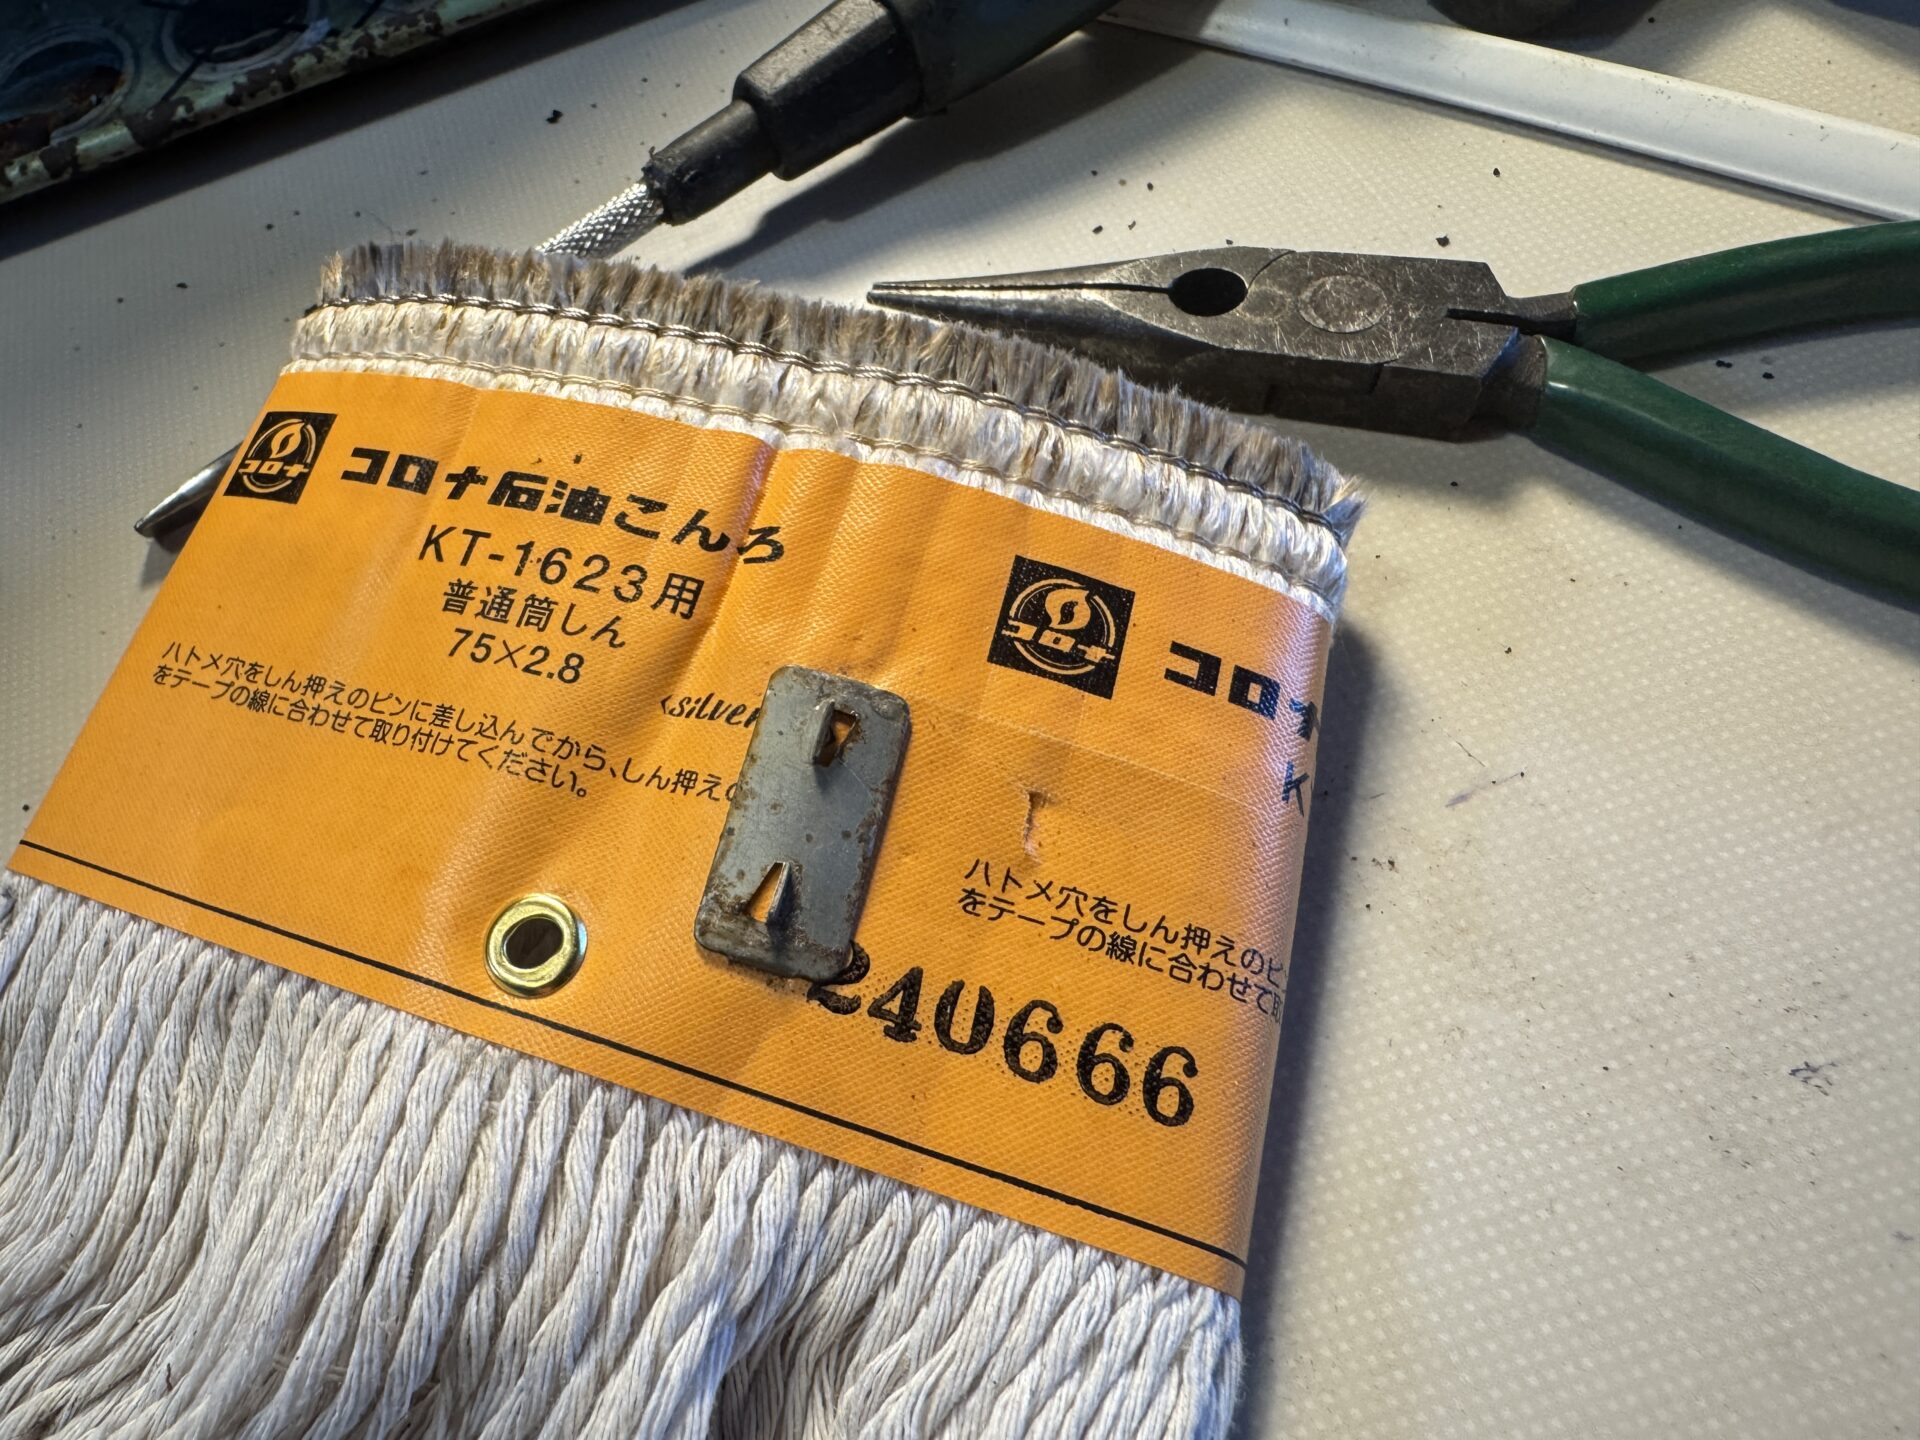
The replacement wick made by domestic heater maker Corona is model “KT-1623,” which fits almost perfectly to the Blue Flame Heater of Aladdin. I say “almost” because while the inner diameter of the tubular section is the same as Aladdin’s genuine wick with Φ75mm diameter, its thickness is 2.8mm, slightly larger than the genuine 2.5mm-thick wick. However, this slight difference in outer diameter will absolutely cause no problem on the wick’s up/down motion.
What I did:
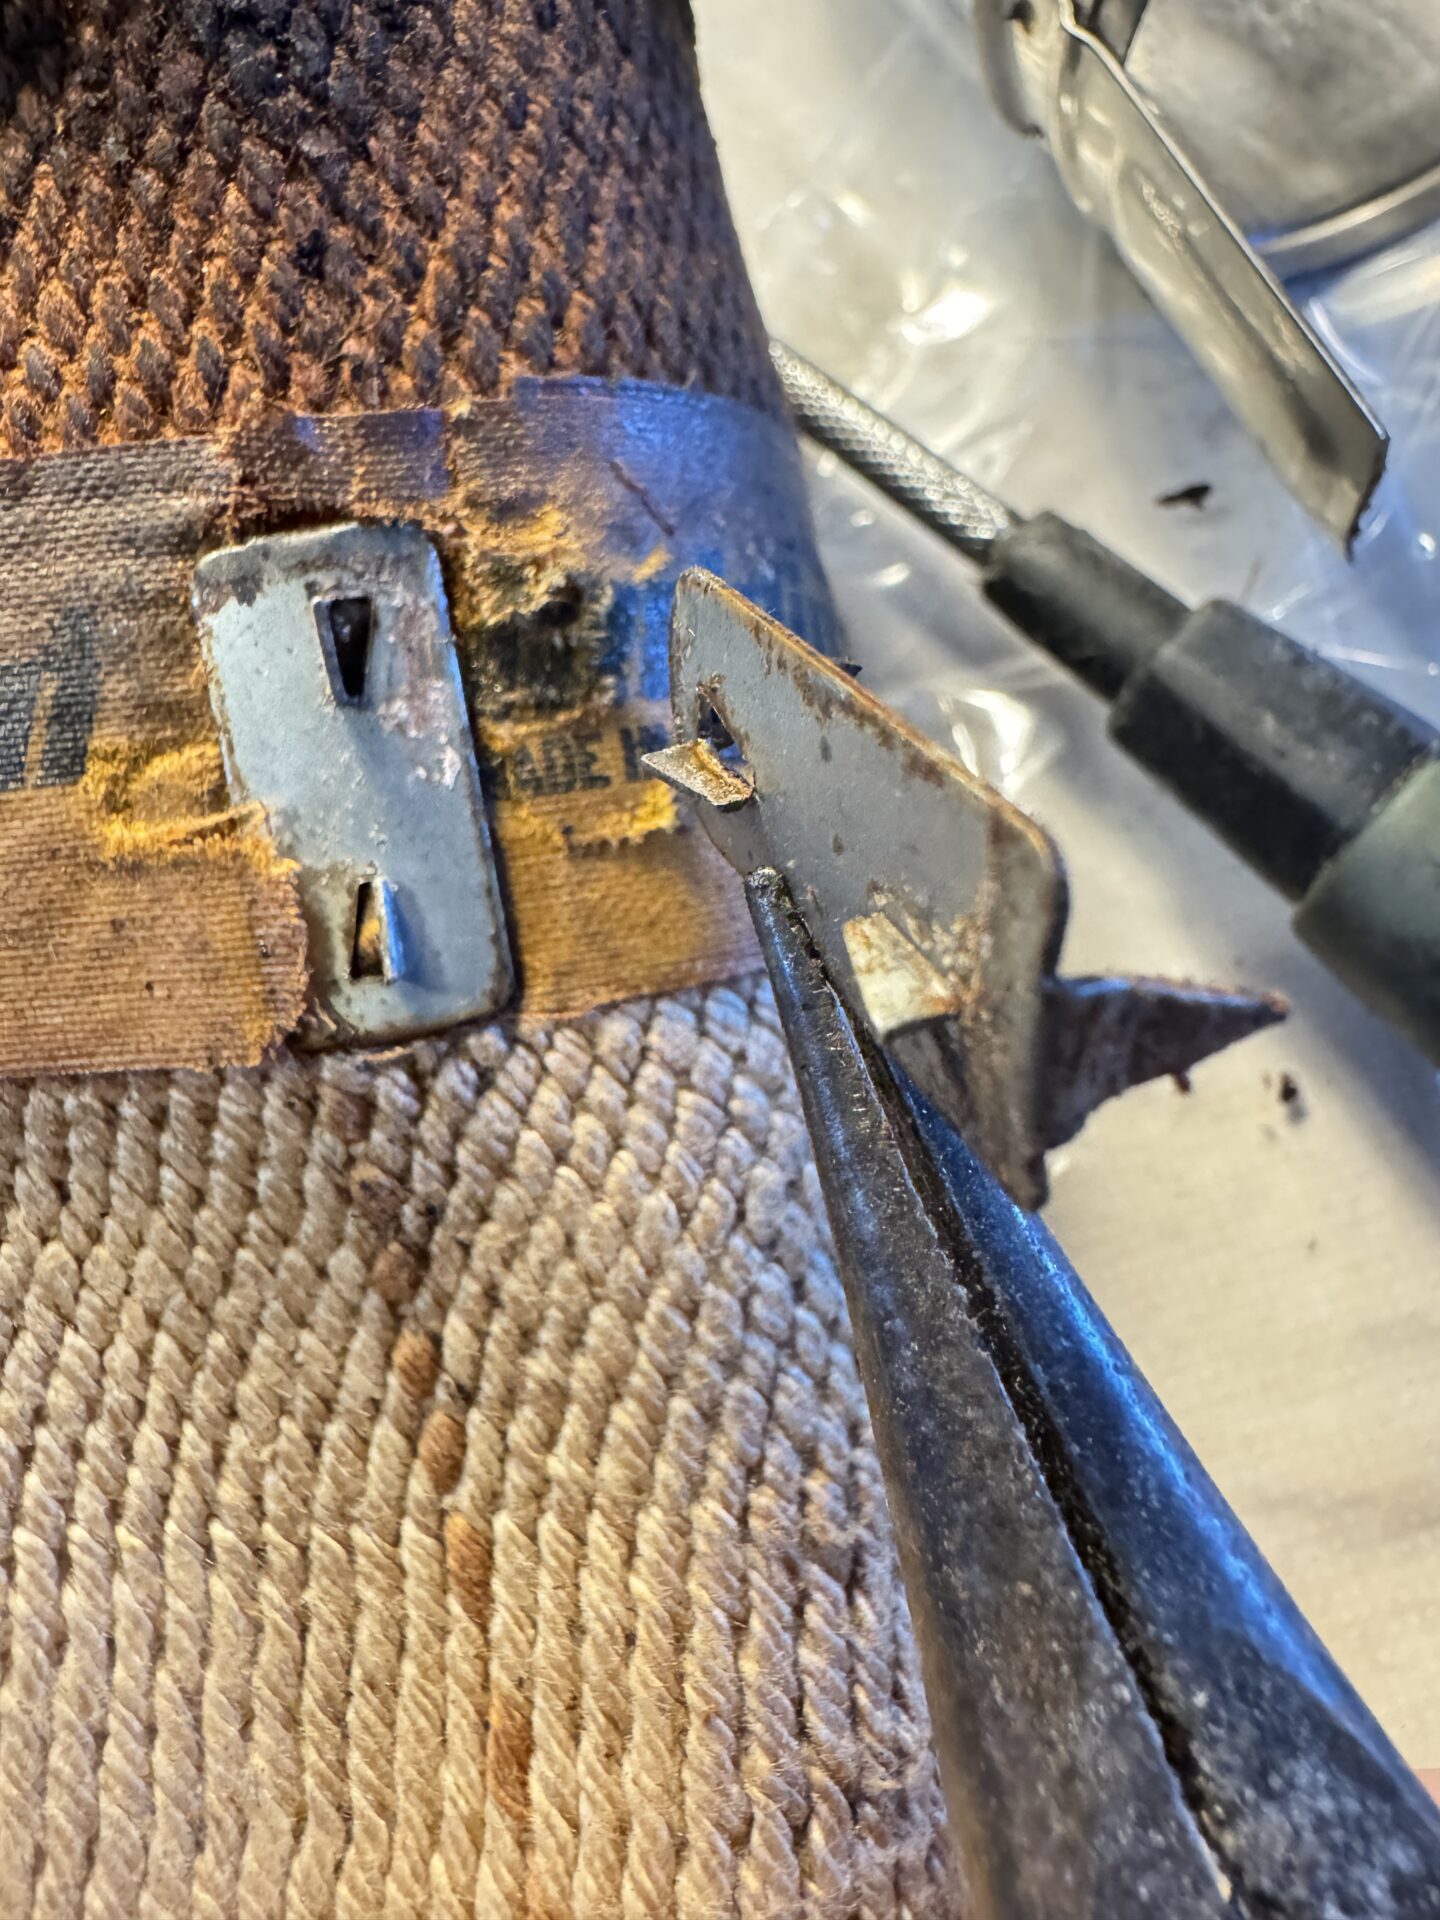
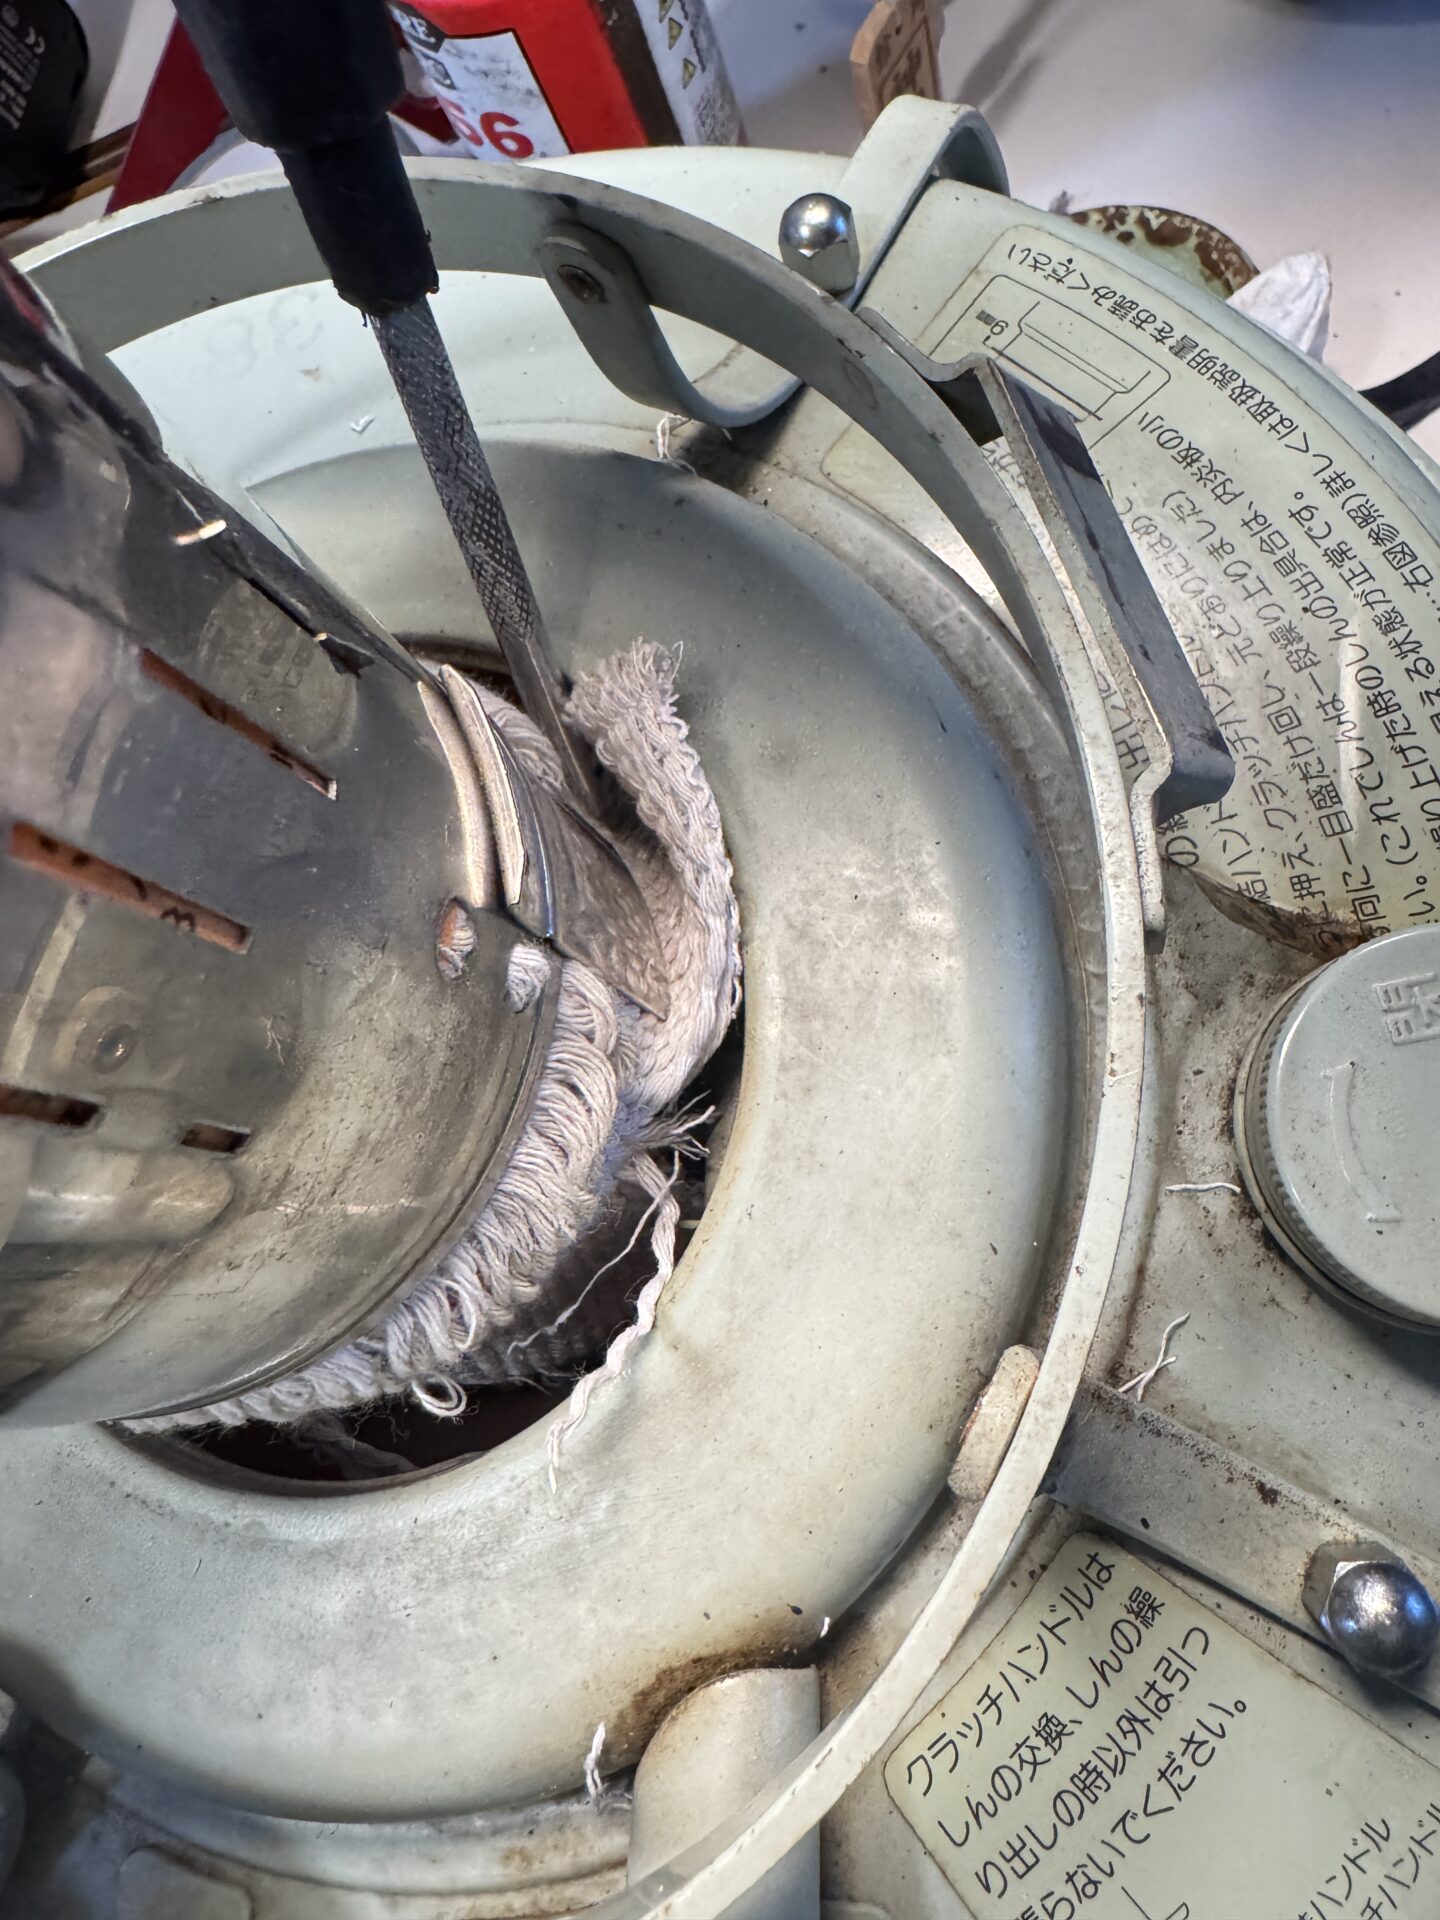
1. Removed the two metal clips with tabs from the old wick and transferred them to the new wick. While at it, removed the brass grommets that could stuck into the inner guide cylinder..
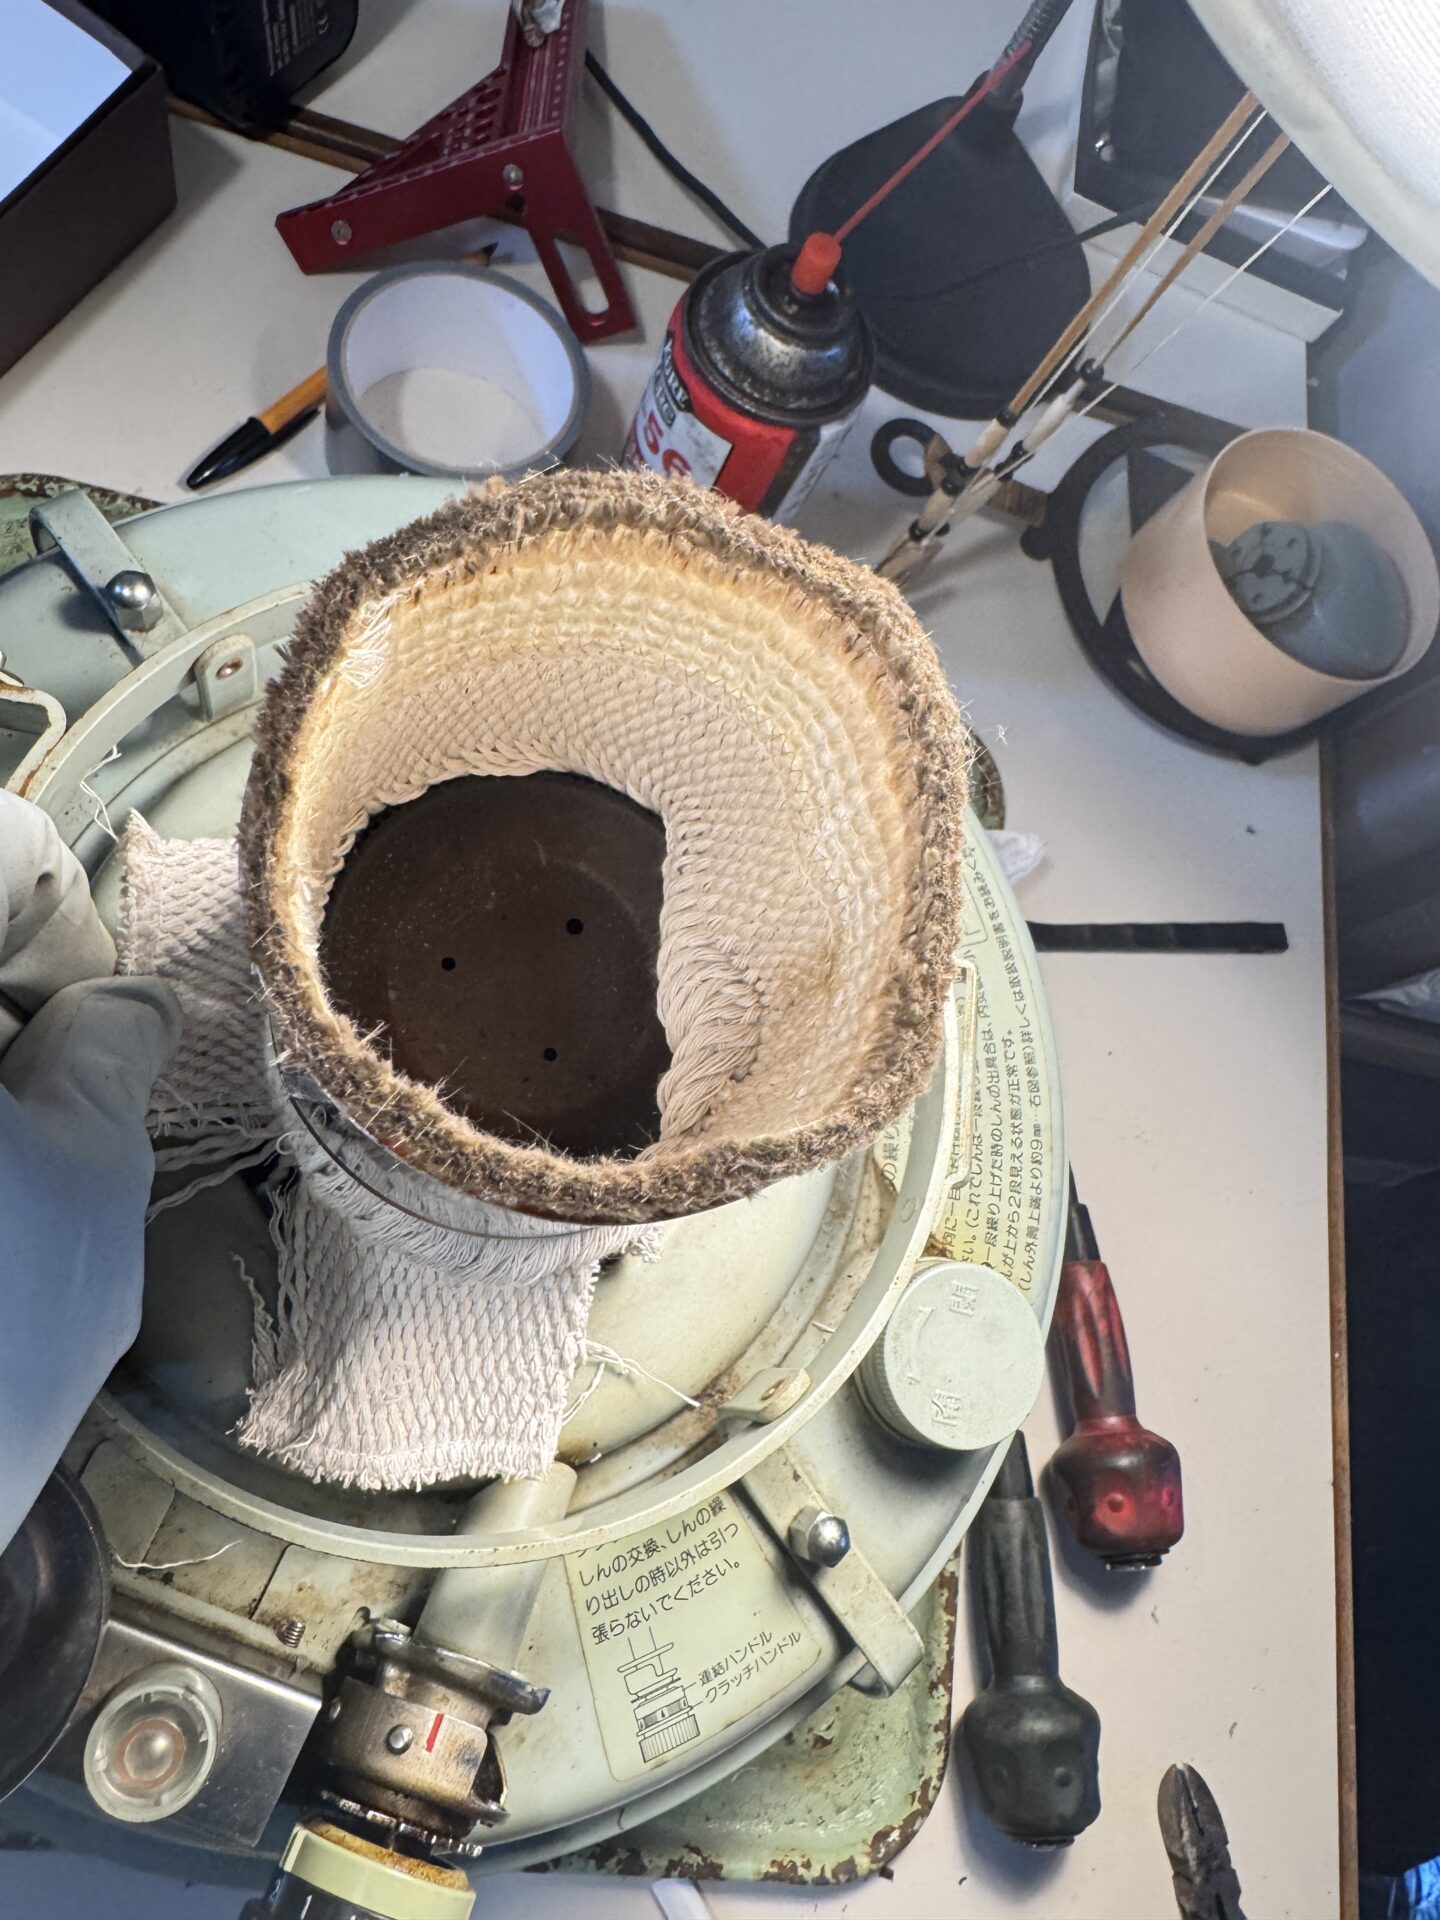
2. Carefully placed the glass wick tip inside the stainless steel mid tube that moves up and down with the wick, taking care not to damage the tip.
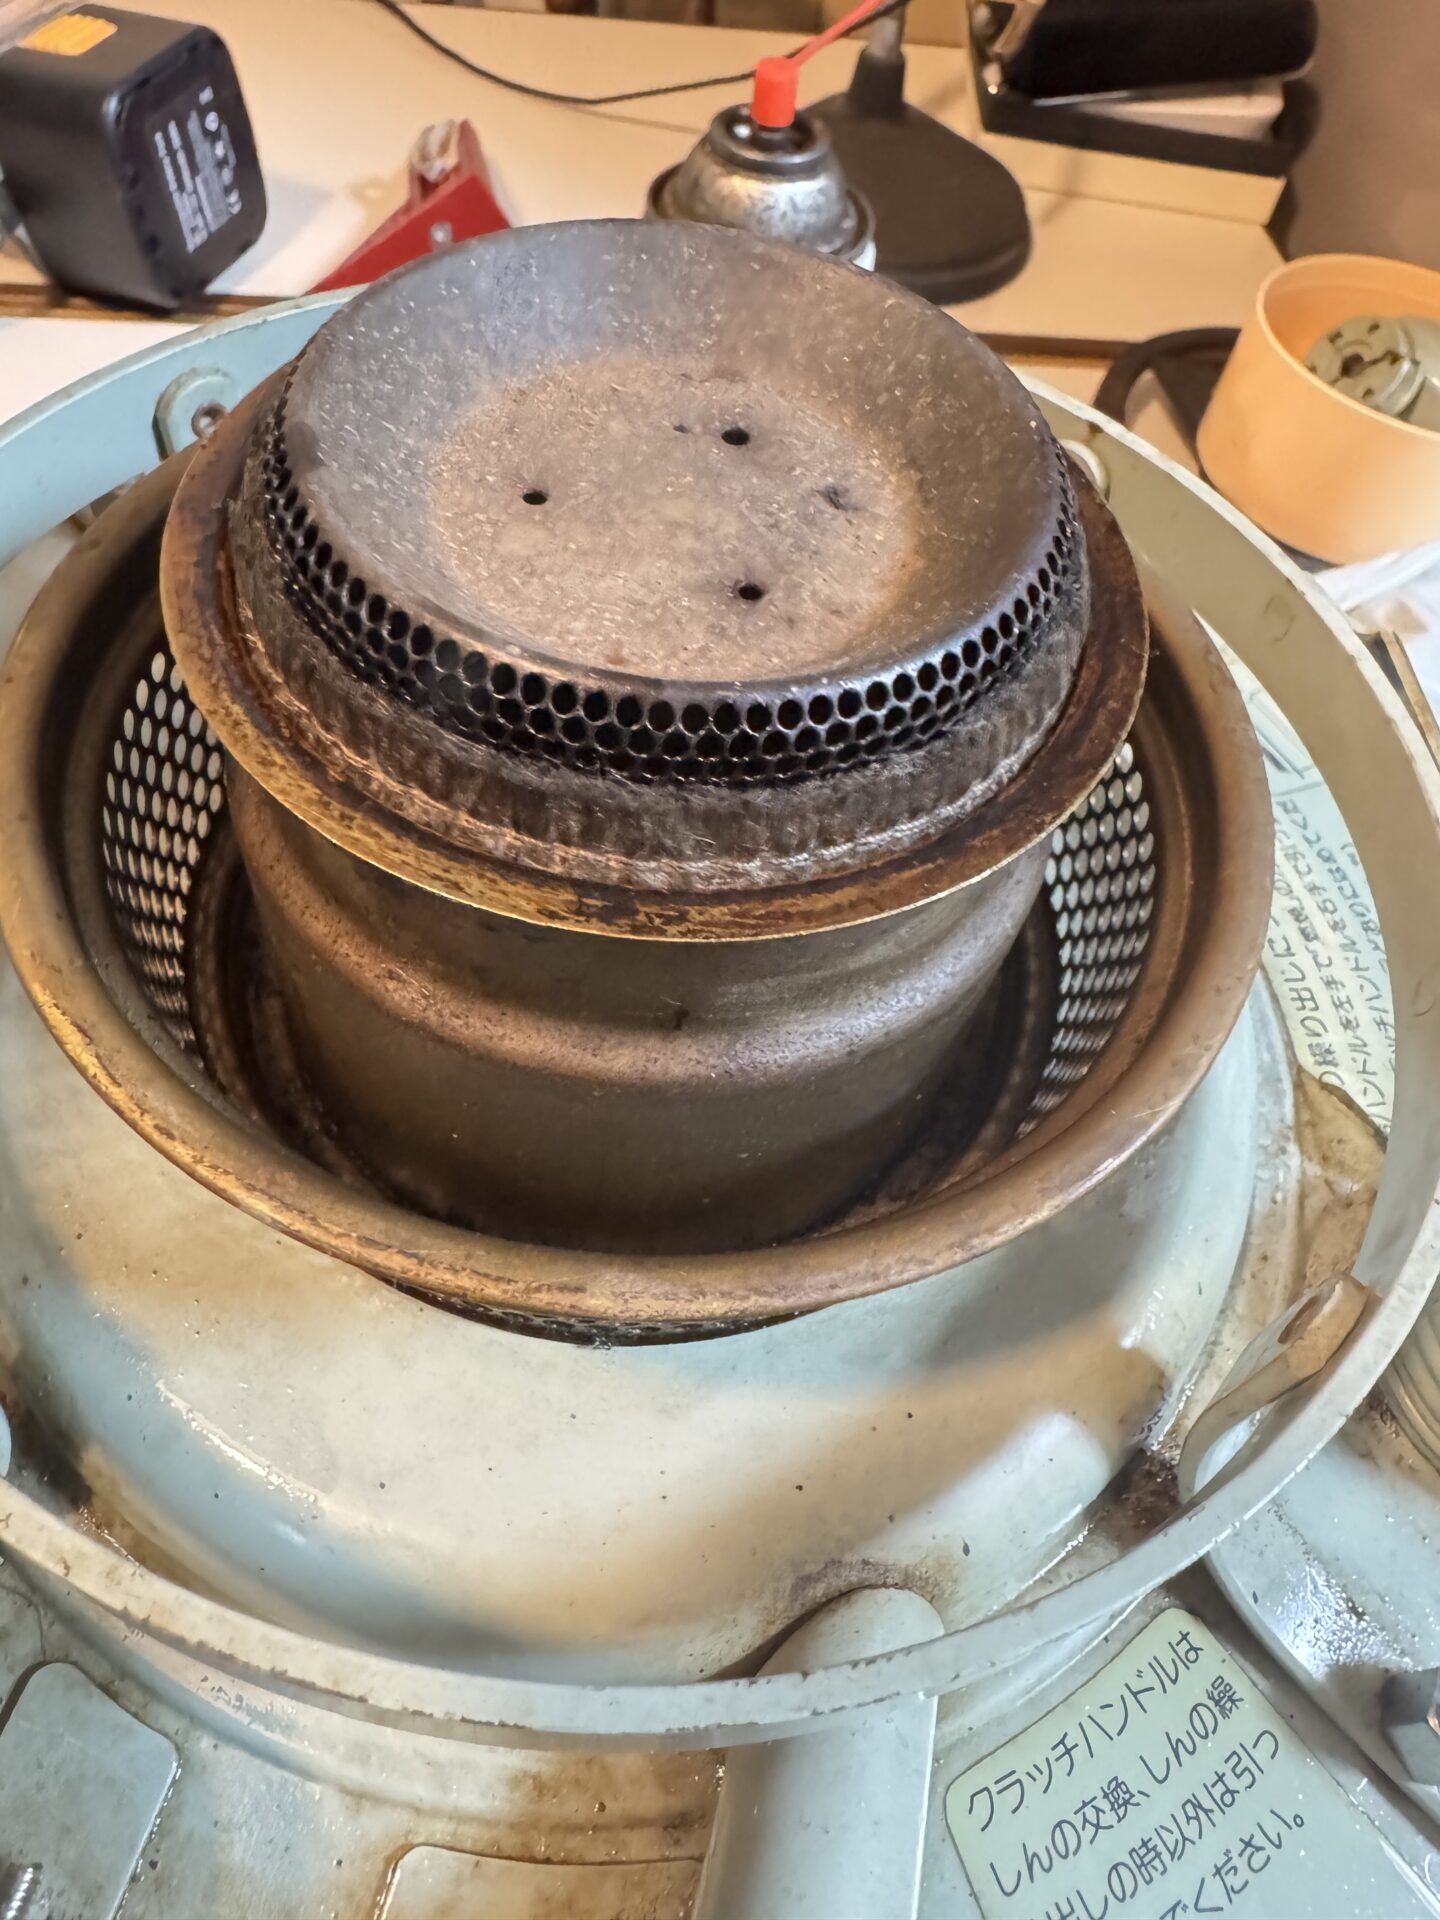
3. Inserted the wick and stainless steel mid tube into the stove’s inner cylinder, pushing the lower skirt of the wick (the section submerged in kerosene) into the tank.
4. Aligned the rack (ladder-like slits) holes, which is punched vertically on the mid tube, with the pinion gear (connected to the adjustment knob) inside the tank. Turned the knob to confirm smooth vertical movement of the wick.
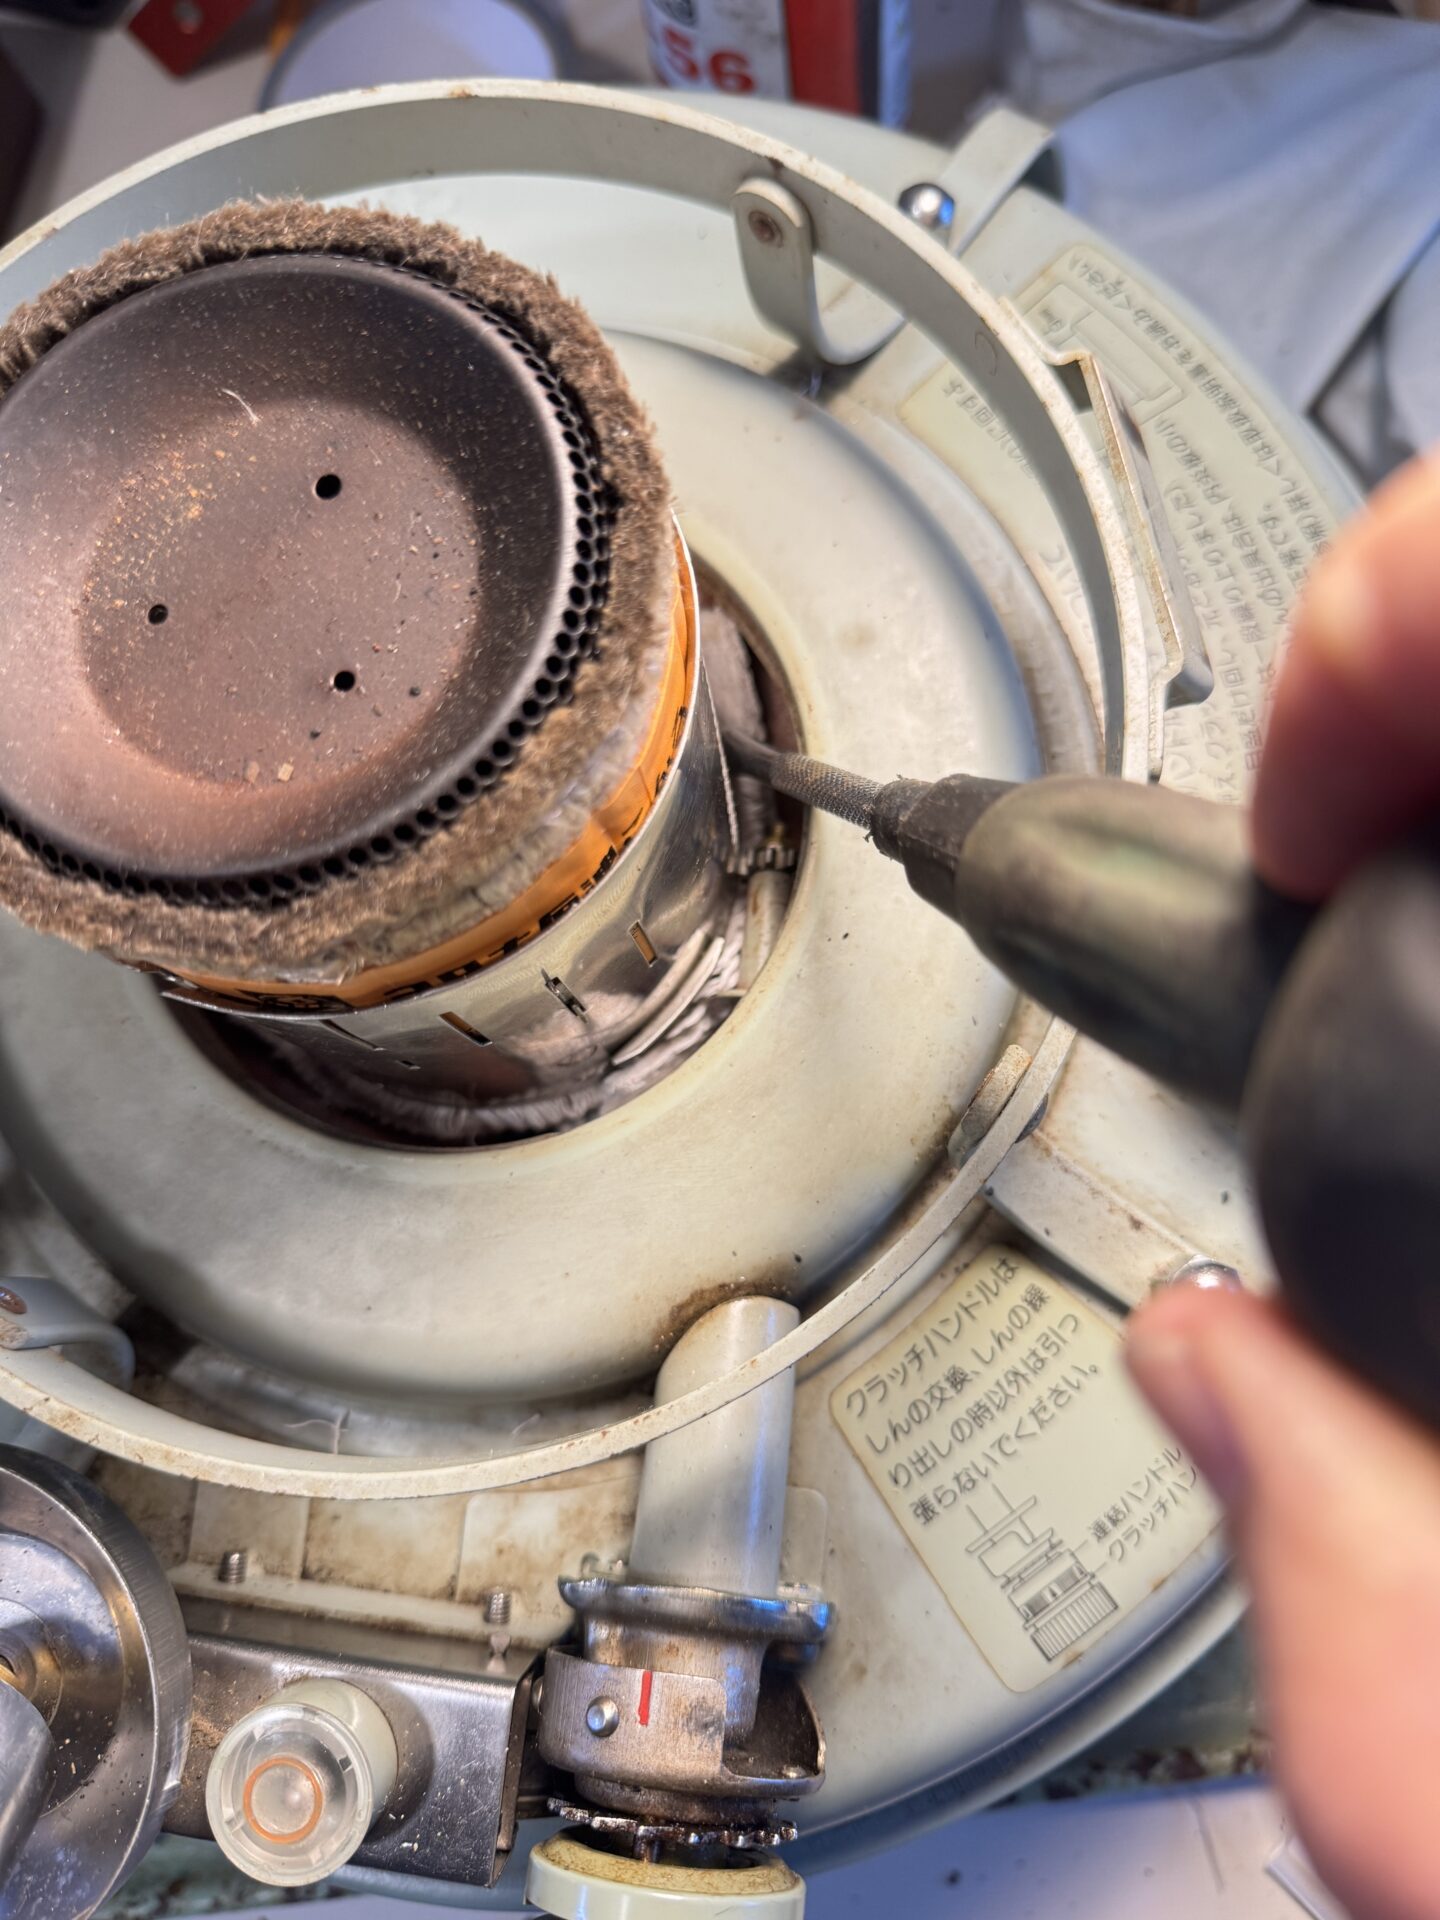
5. Attached the outer cylinder to the top of the tank.
6. Smoothed the tip of the glass fiber wick by gently rubbing it with the side of a screwdriver’s metal rod. (If the tip remains frayed, an orange flame instead of a blue flame appears, causing soot and unpleasant odors.)
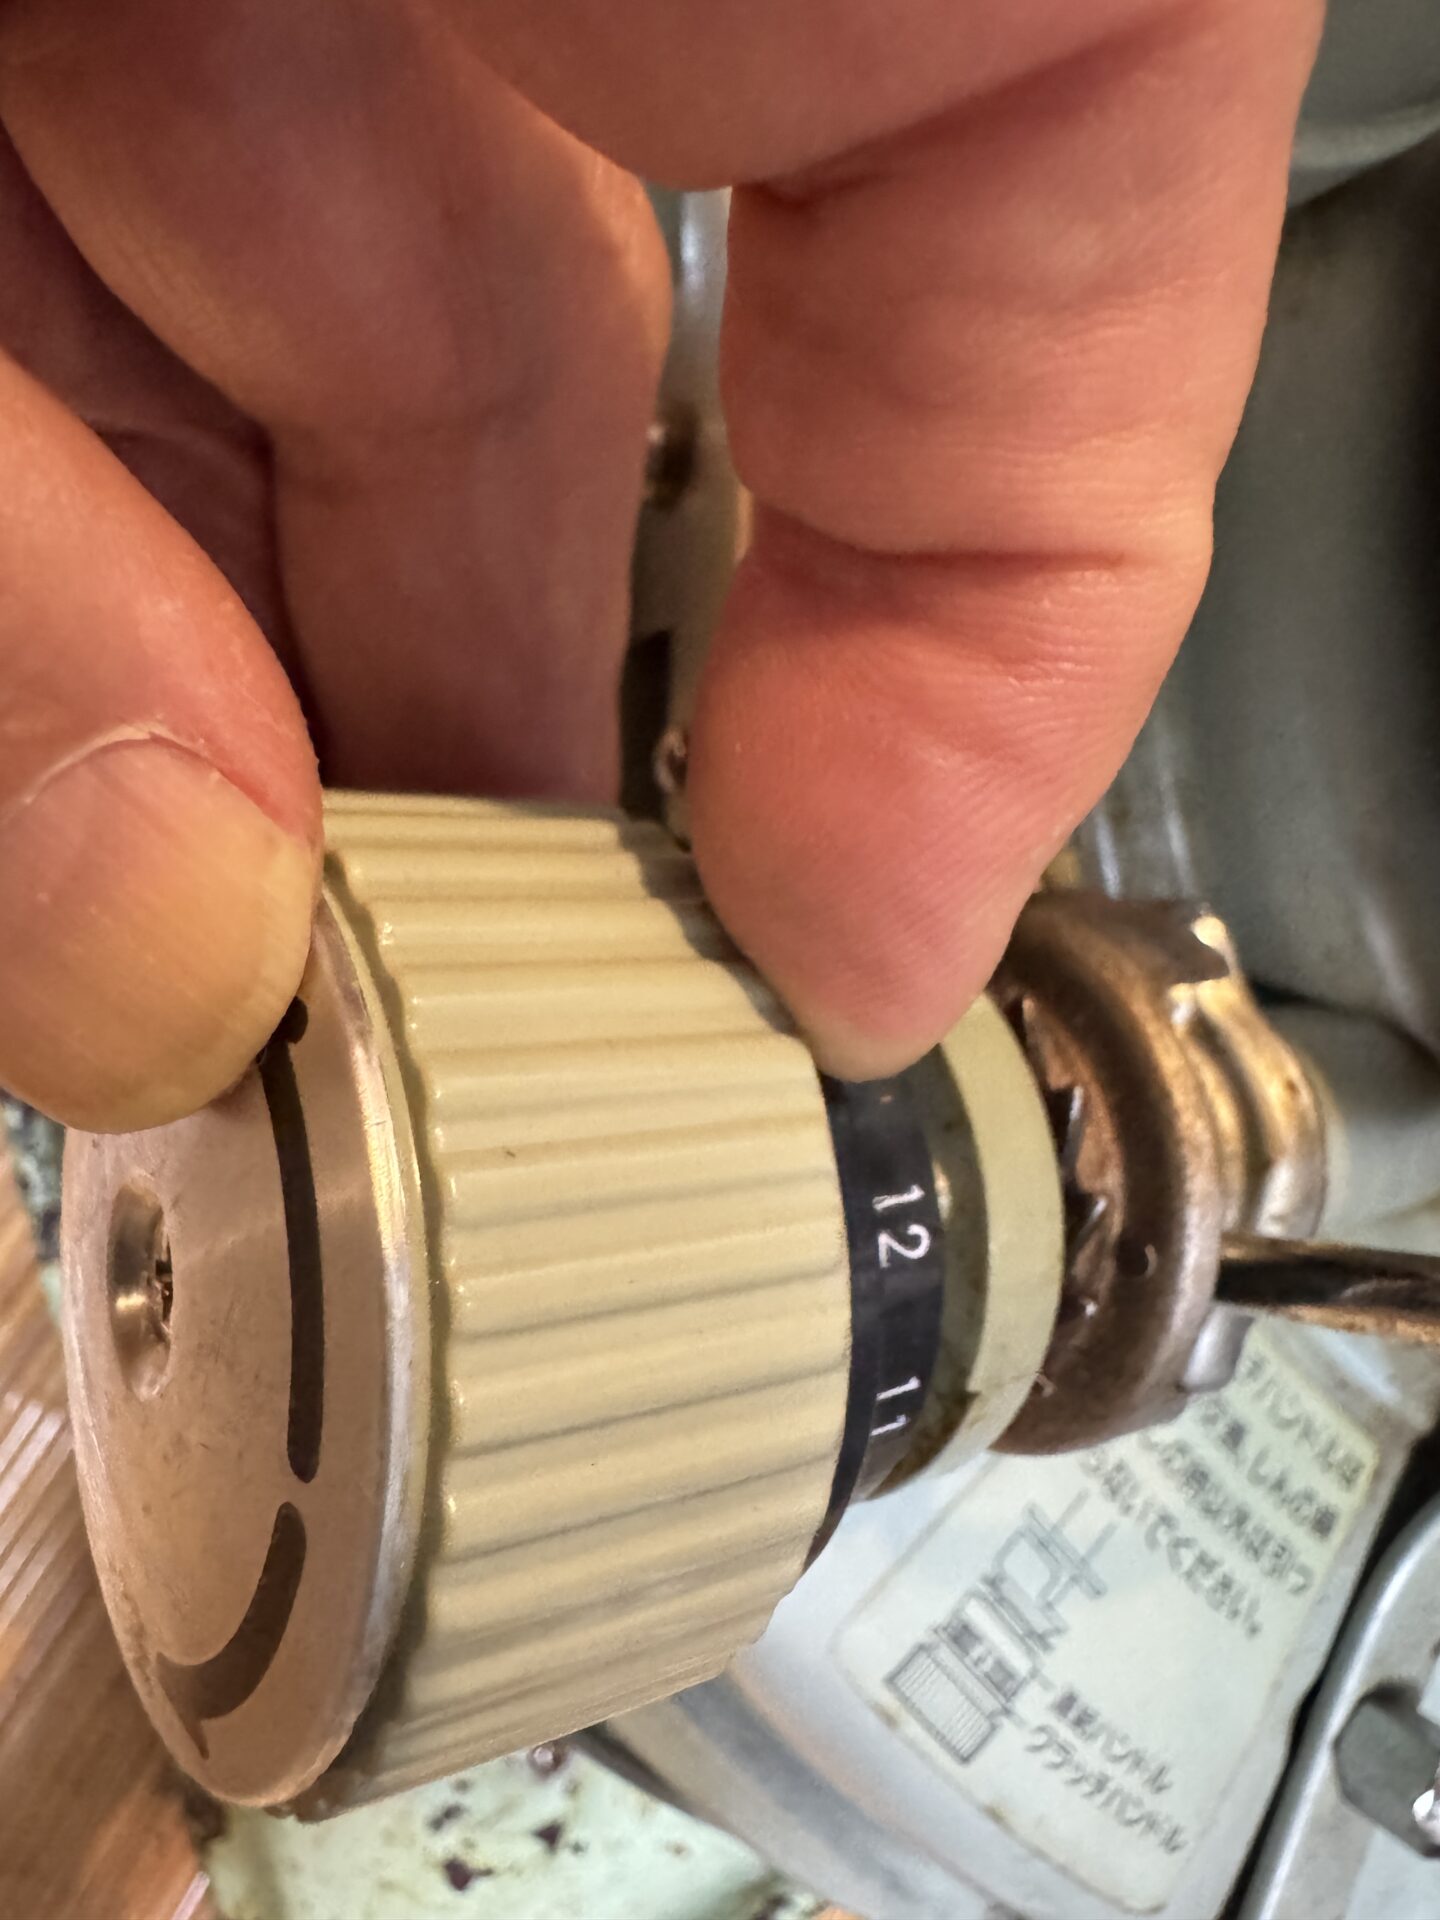
7. Adjusted the heat control knob and the wick-raising dial, then engaged the safety device.
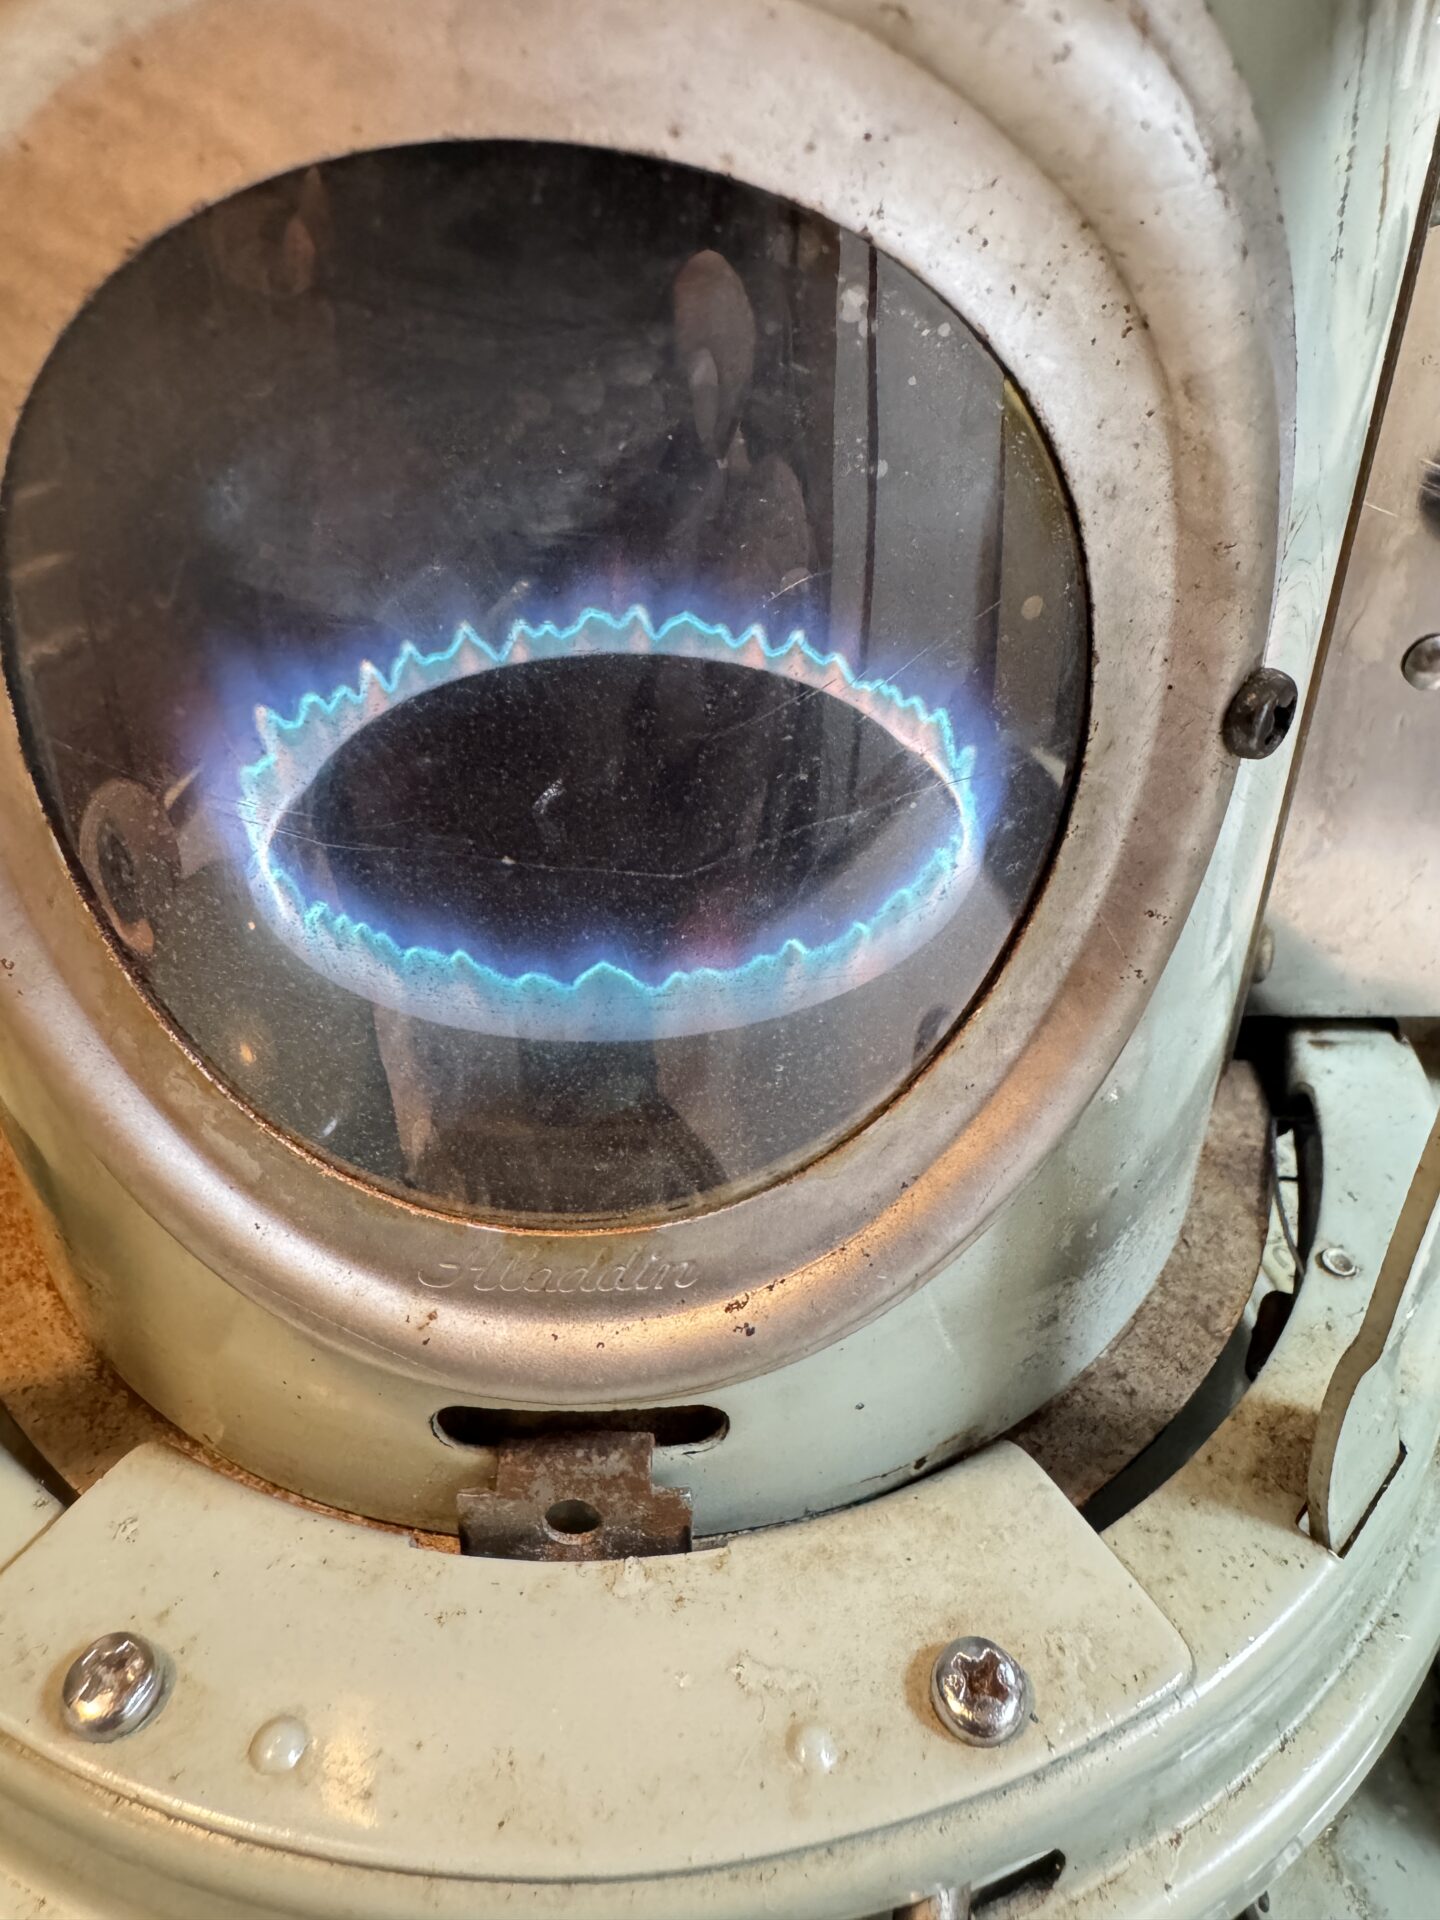
8. Filled up with kerosene and did a test burn. If any red/yellowish areas appears in the flame, the wick may be dirty or the fibers tangled. Adjust the wick shape as in step 6. (If this won’t work, trim the tangled glass fibers or trim the entire circumference of the wick with scissors.)
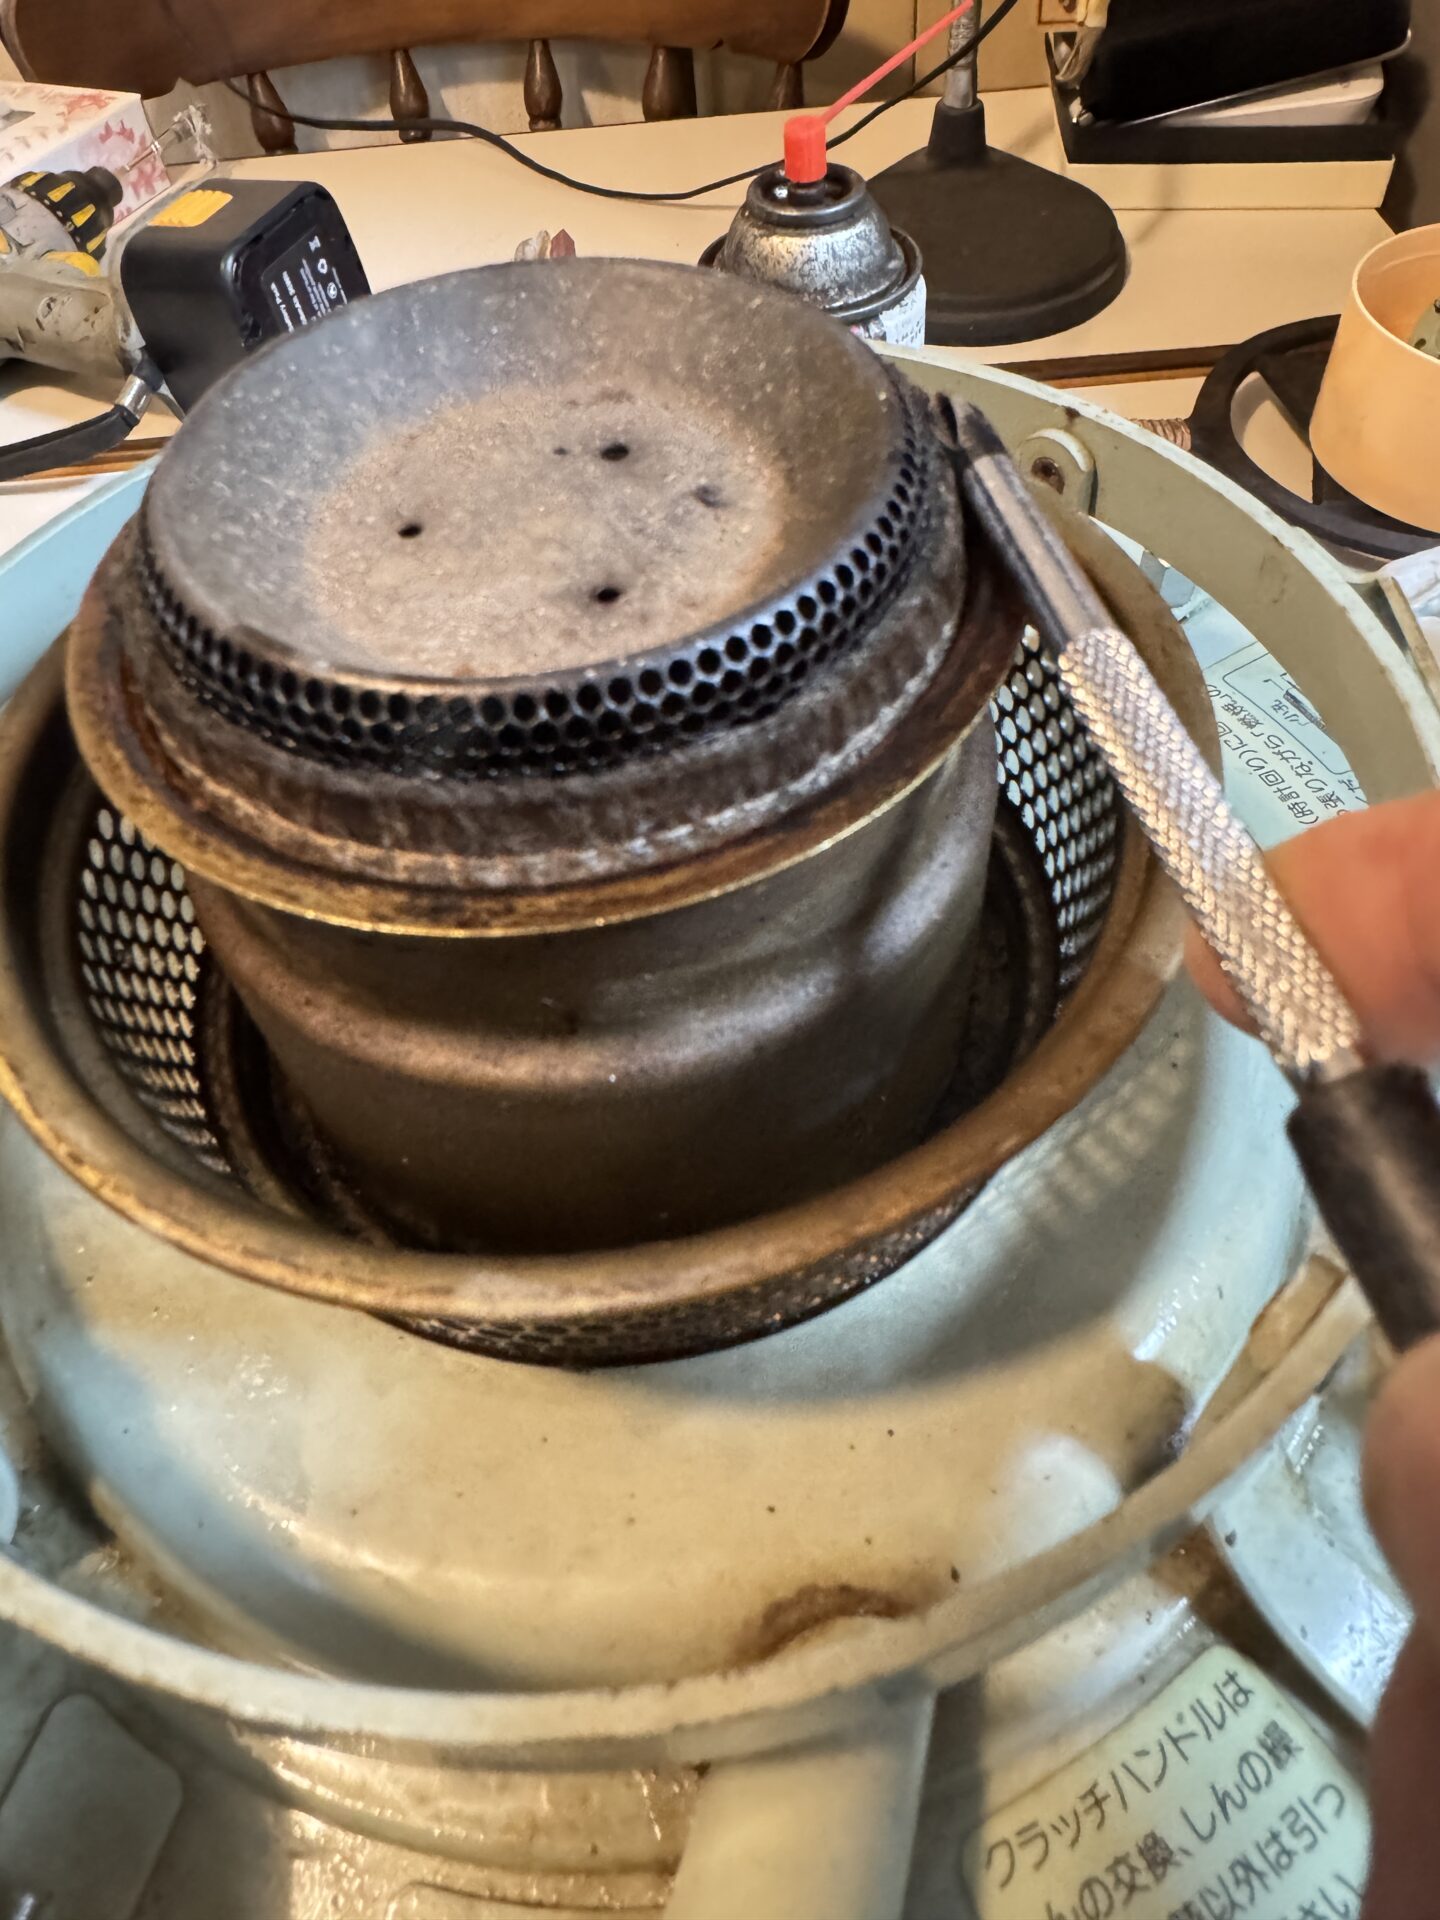
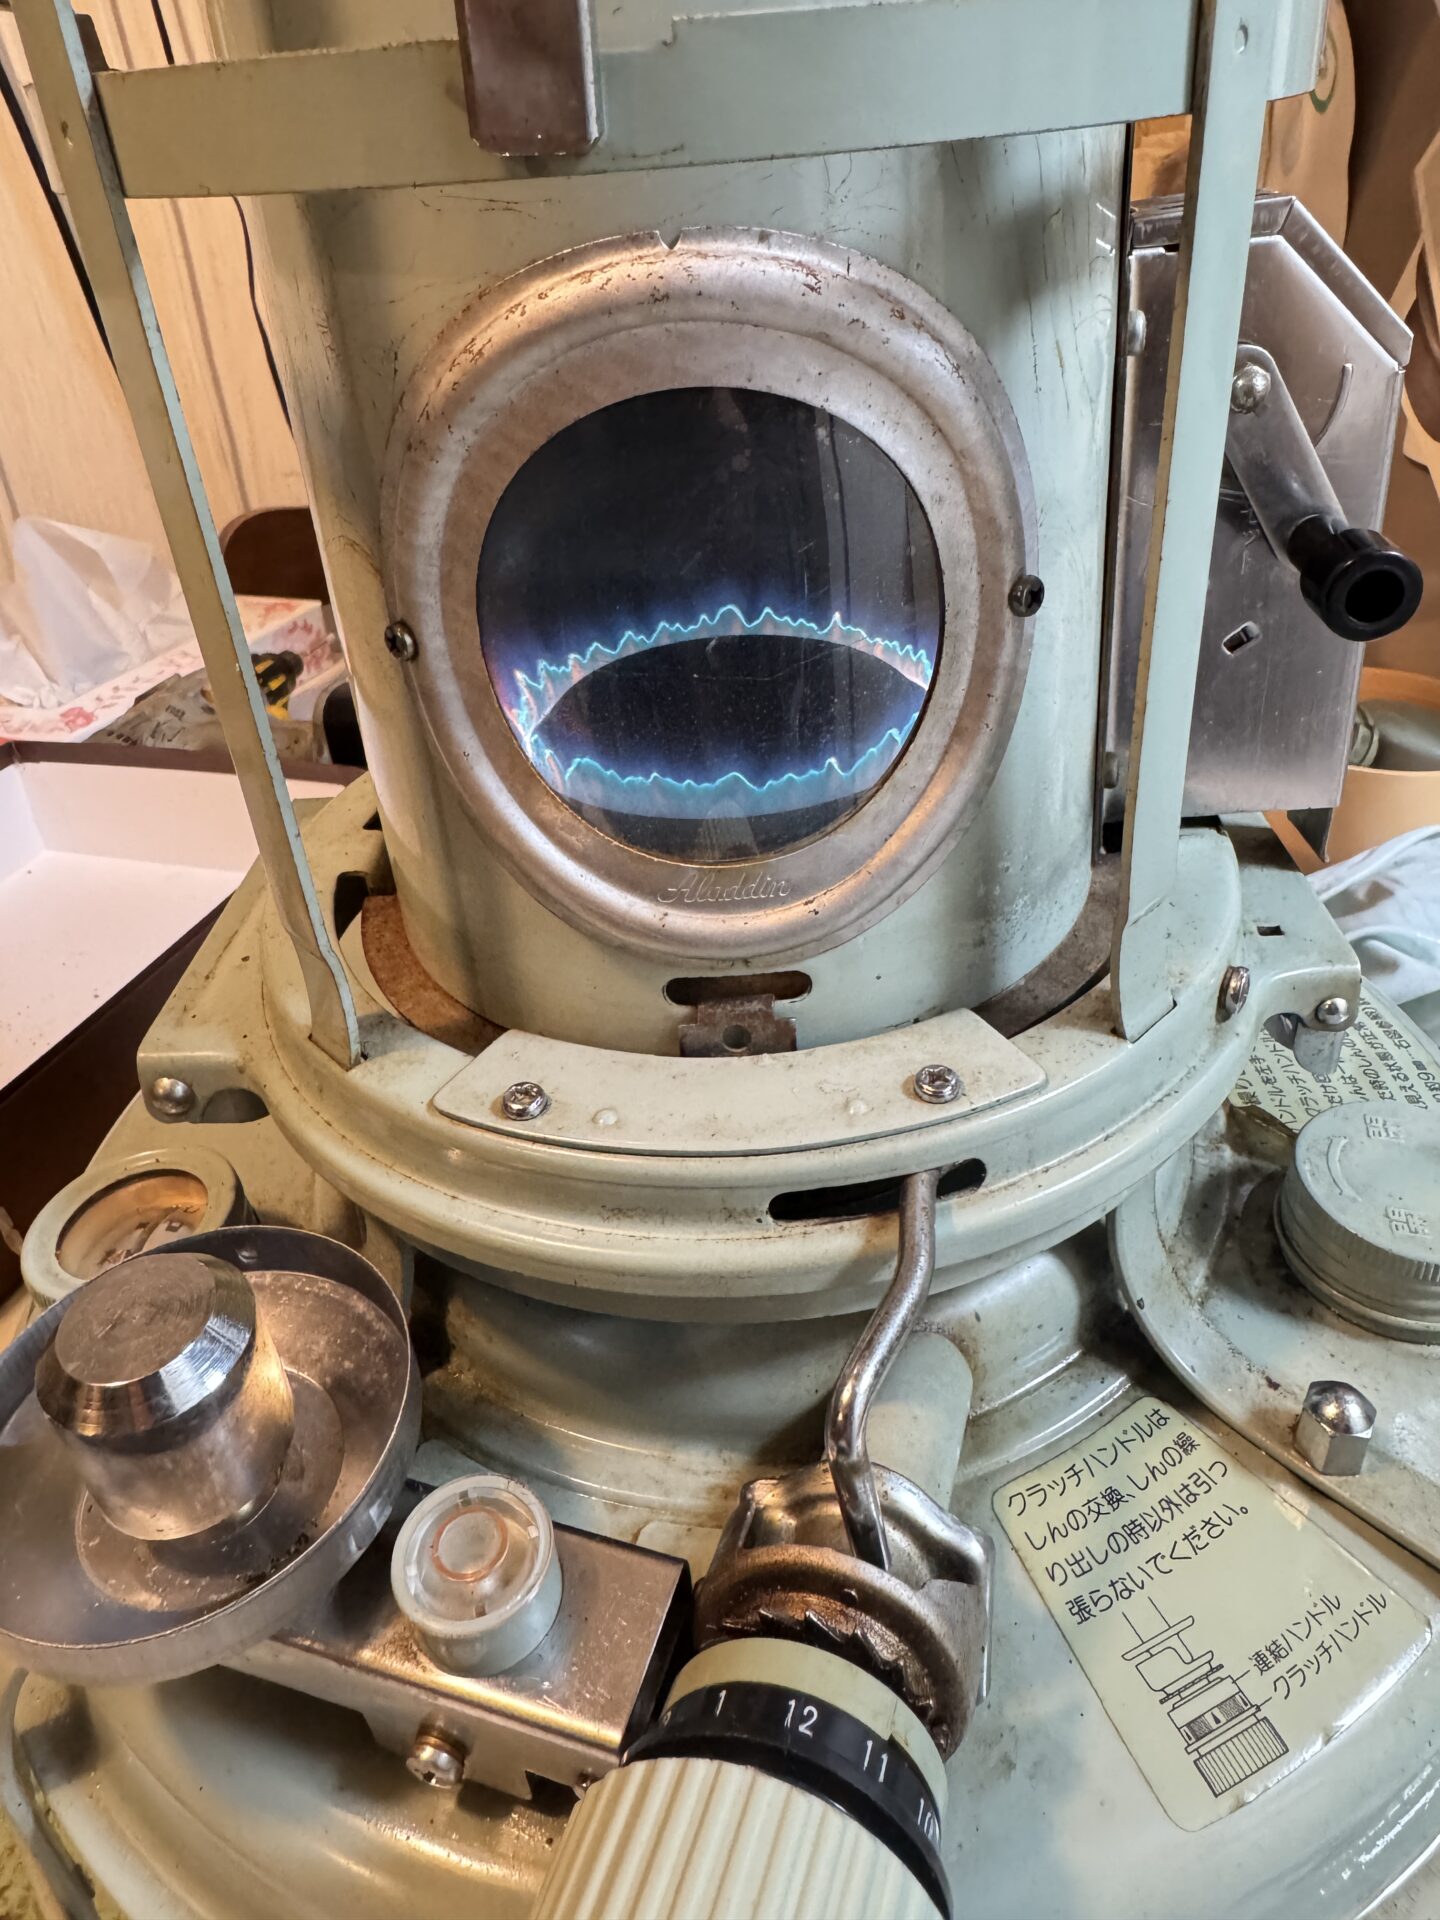
Well, the test burn went extremely smoothly, and no trimming was needed. There’s a slight kerosene smell in the exhaust, likely from the CRC556 used for cleaning or residual kerosene splatters. This should dissipate with use over time. Most importantly, the flame is stable. There’s no sign of the common Blue Flame Heater issue where a slight breeze turns the flame yellow and fills the room with soot.
Apart from the rusty worn-out stove tray, the stove itself has no rust or major damage. It should serve well for years to come.